How to Send Your First WhatsApp Broadcast with Updatrr
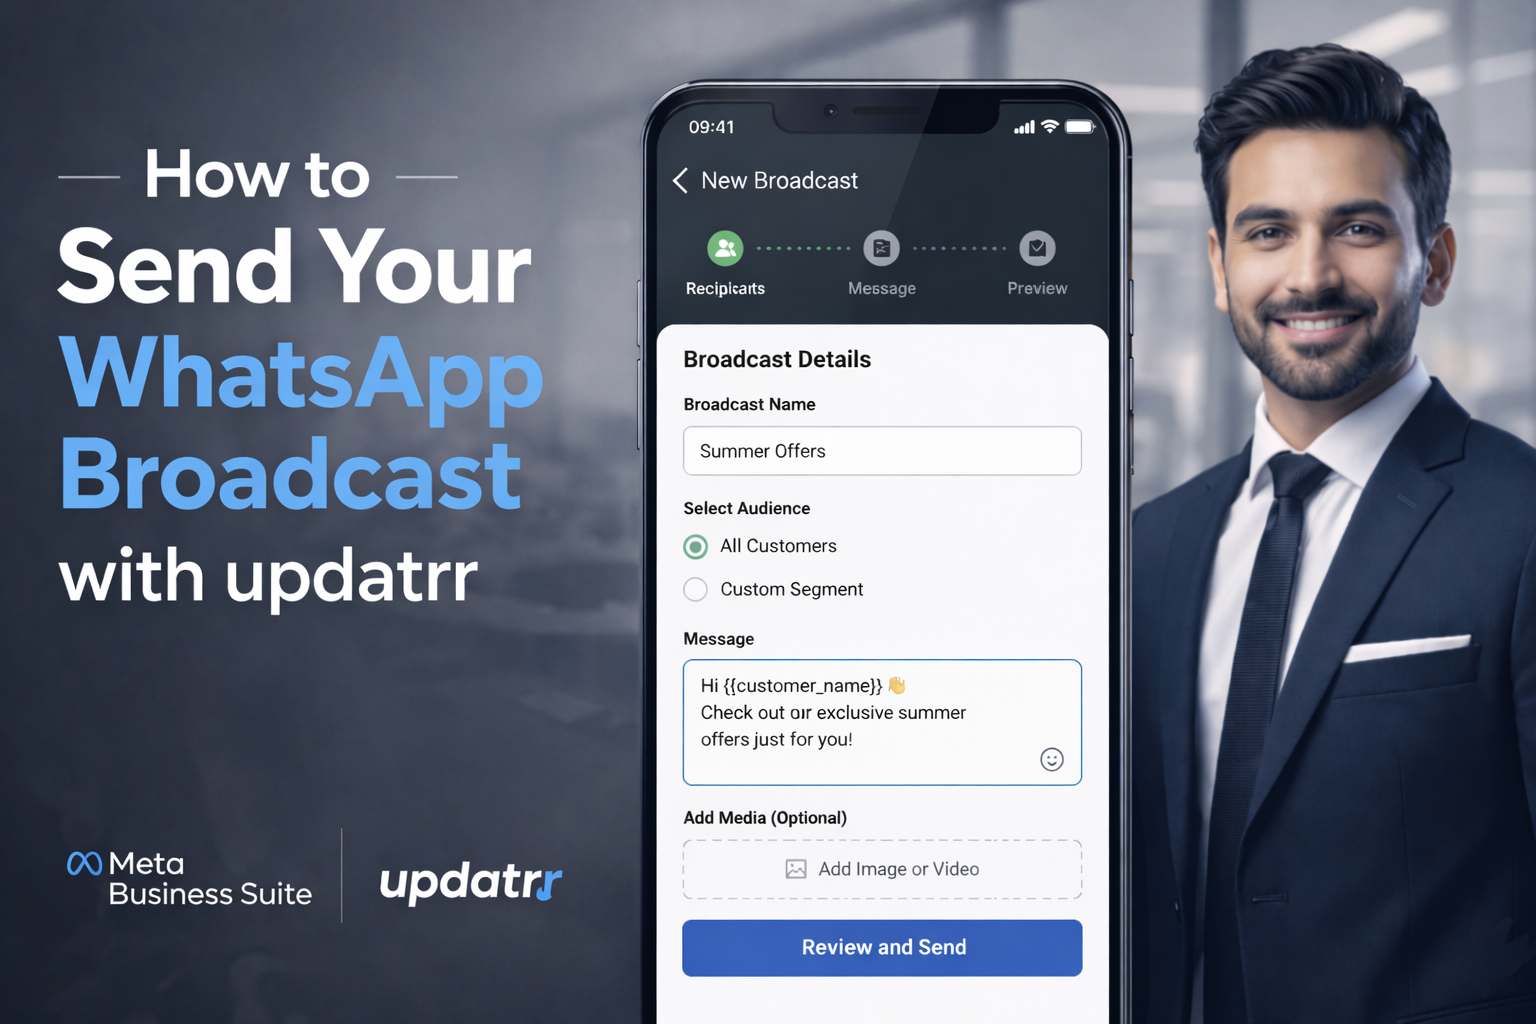
Ready to reach your customers where they actually look? Sending a WhatsApp broadcast is one of the fastest ways to boost your sales. Here is a simple, 10-step guide to getting your first campaign out the door.
Part 1: Starting Your Campaign
Step 1: Open Broadcasts Inside your Updatrr app, look at the top menu and click on Broadcast Campaigns.
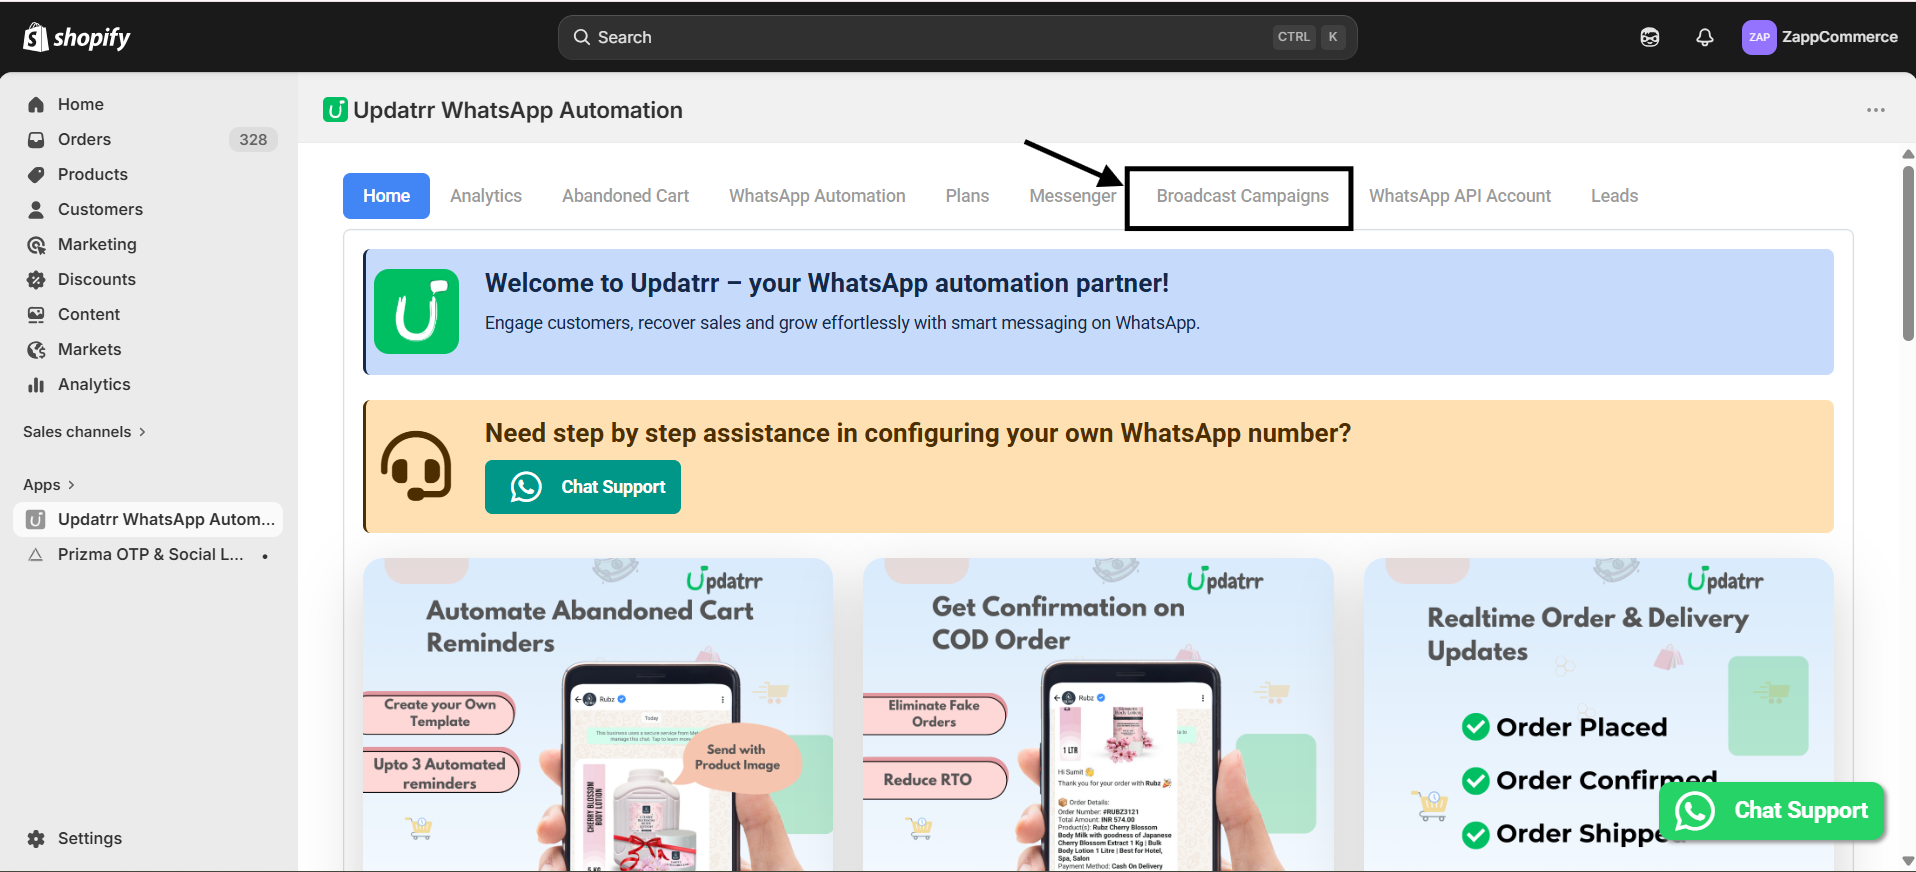
Step 2: Start New Click the green + Create Campaign button on the right side of your screen.

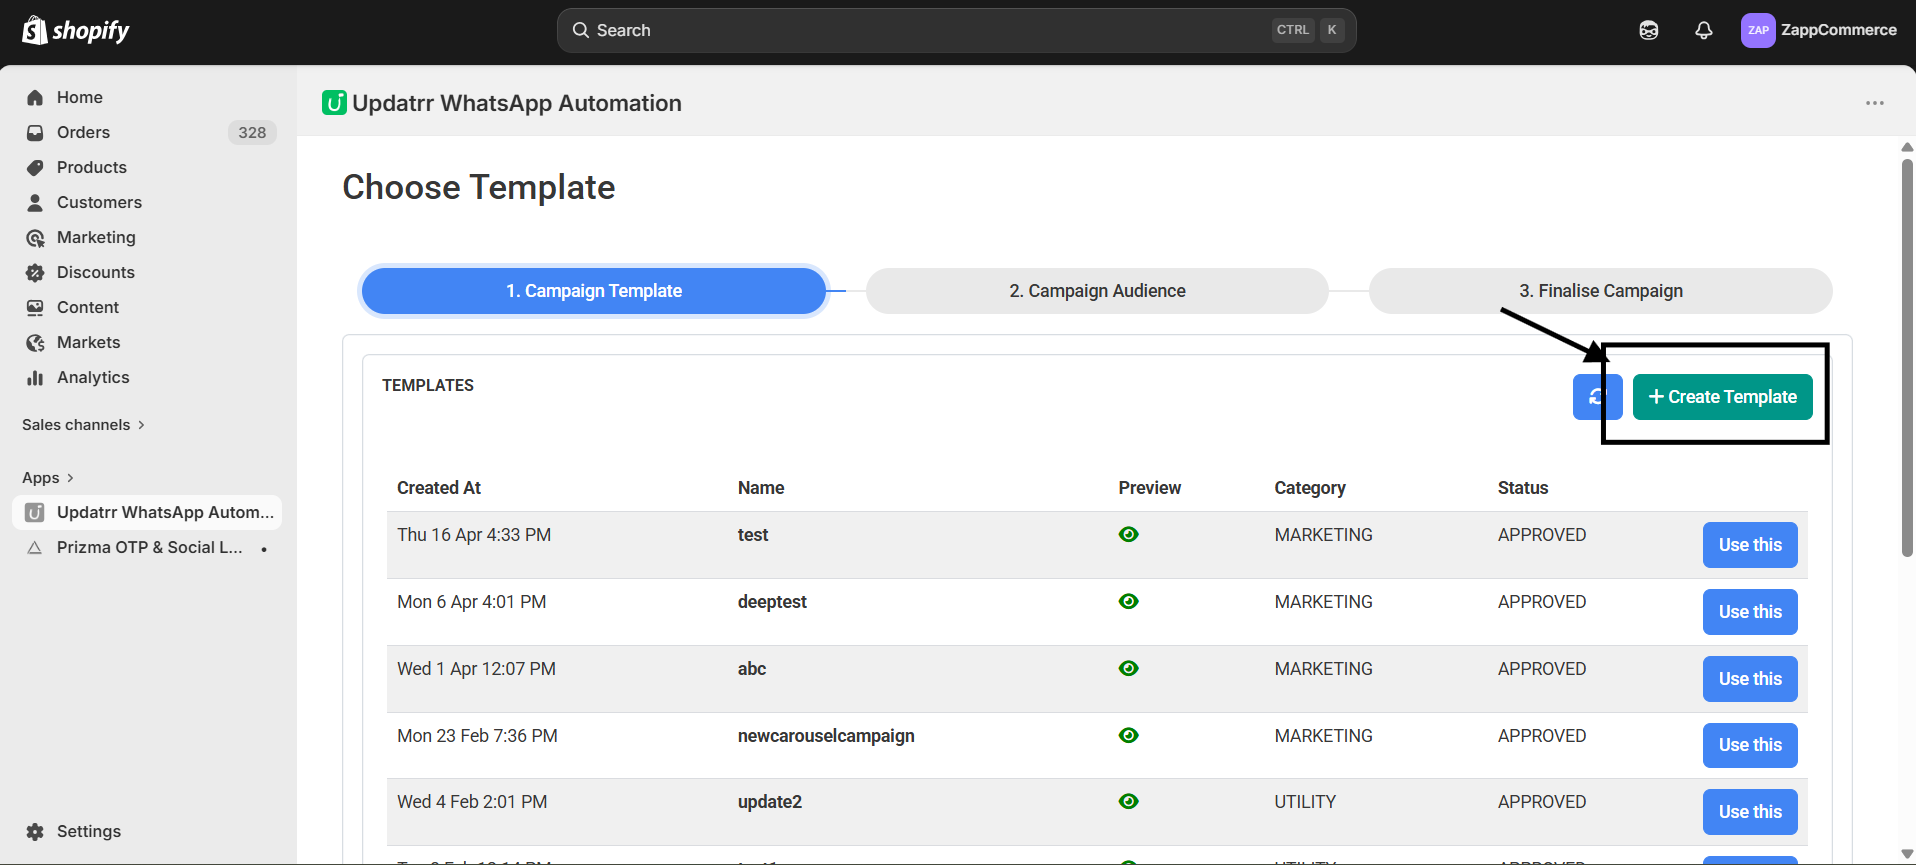
Step 3: Create Your Template You’ll see a list of templates. To make your own unique message, just click the green + Create Template button at the top right.
Part 2: Designing Your Message
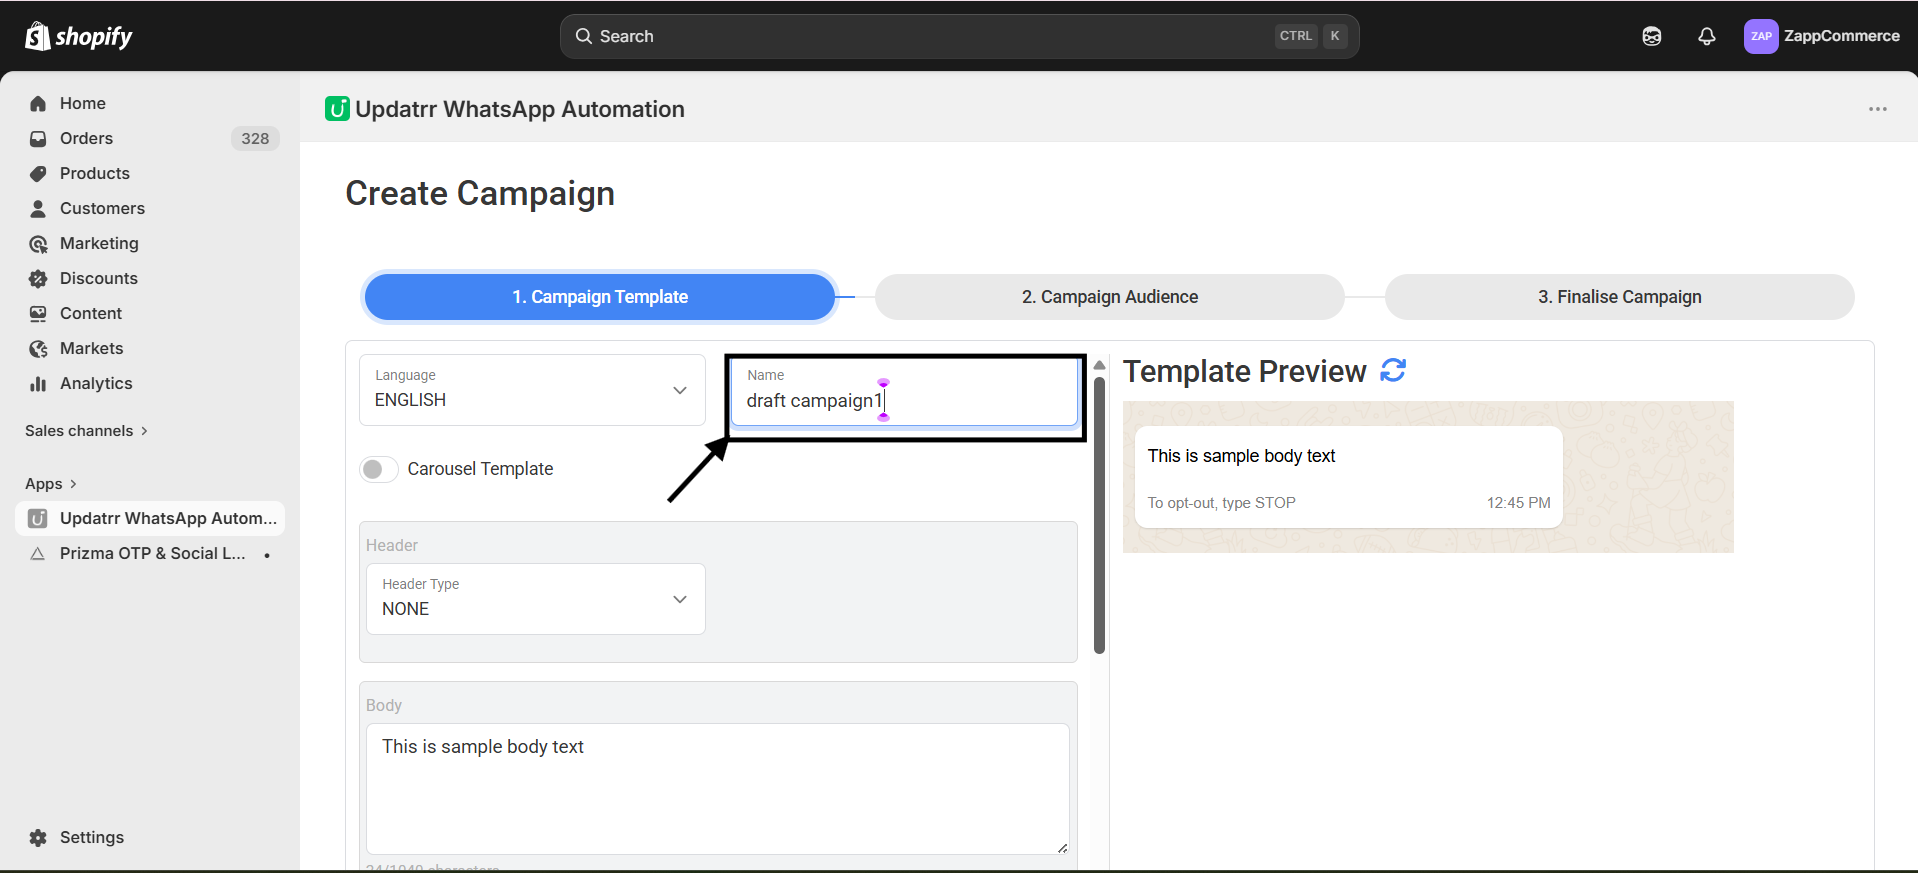
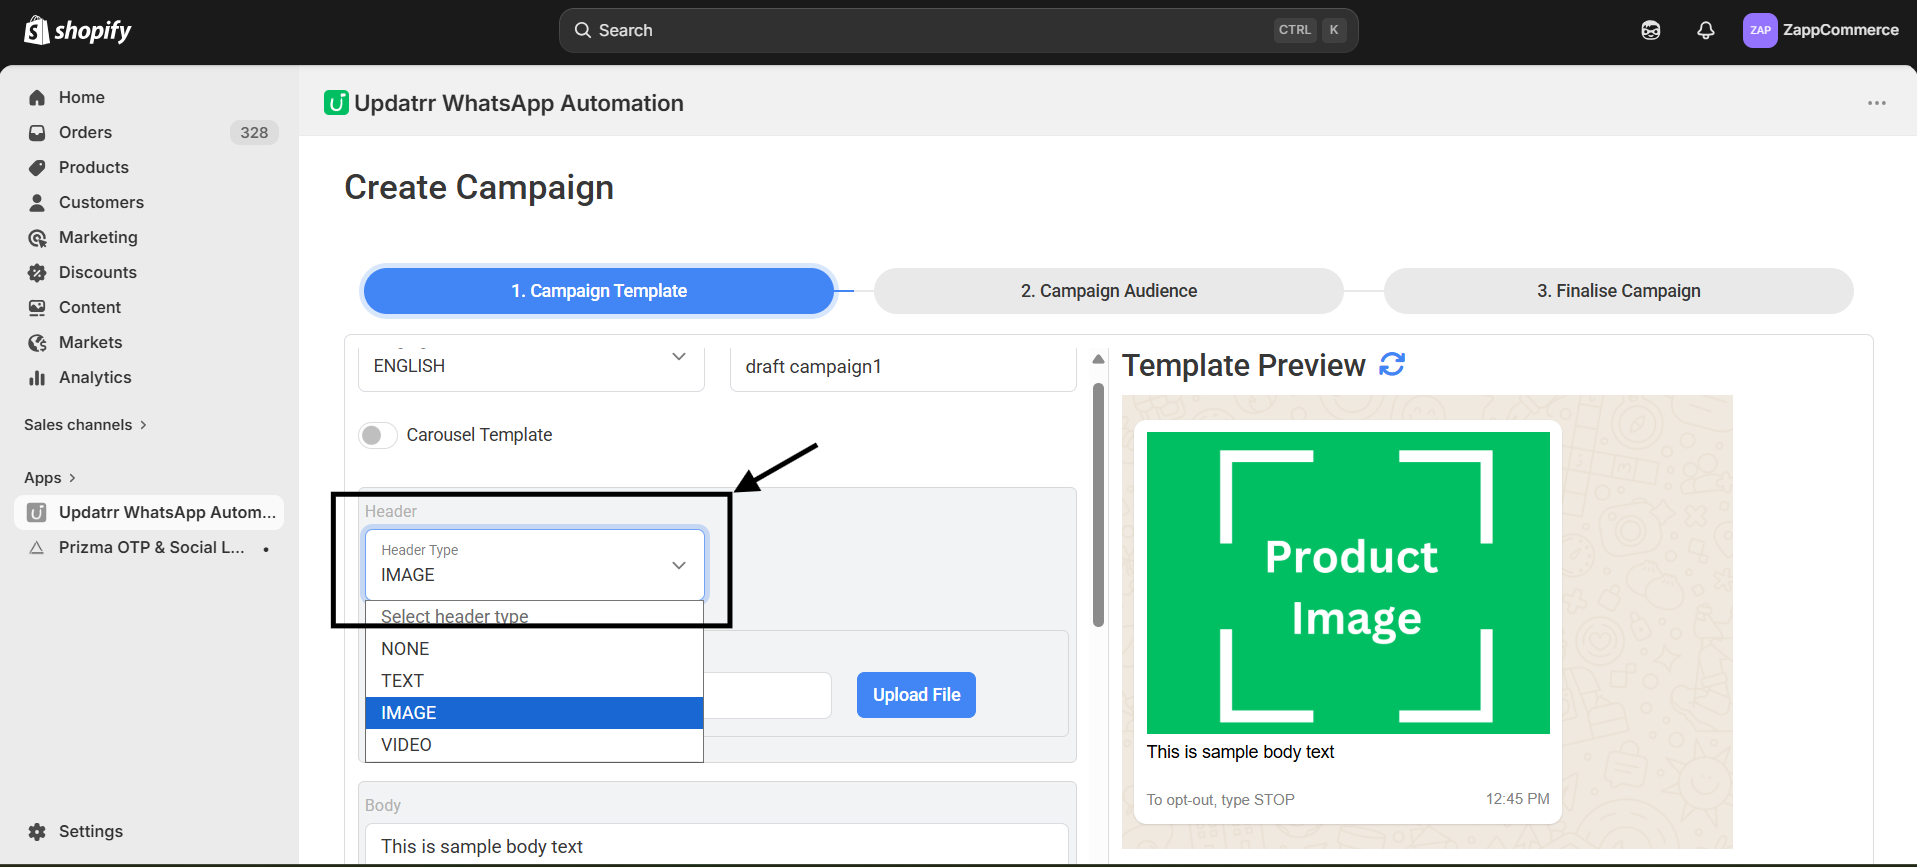
Step 4: Give it a Name Type in a name for your campaign (like "Big Summer Sale") and pick your language. This helps you stay organized later.
Step 5: Pick Your Header Do you want a photo at the top of your message? In the Header Type box, select IMAGE.
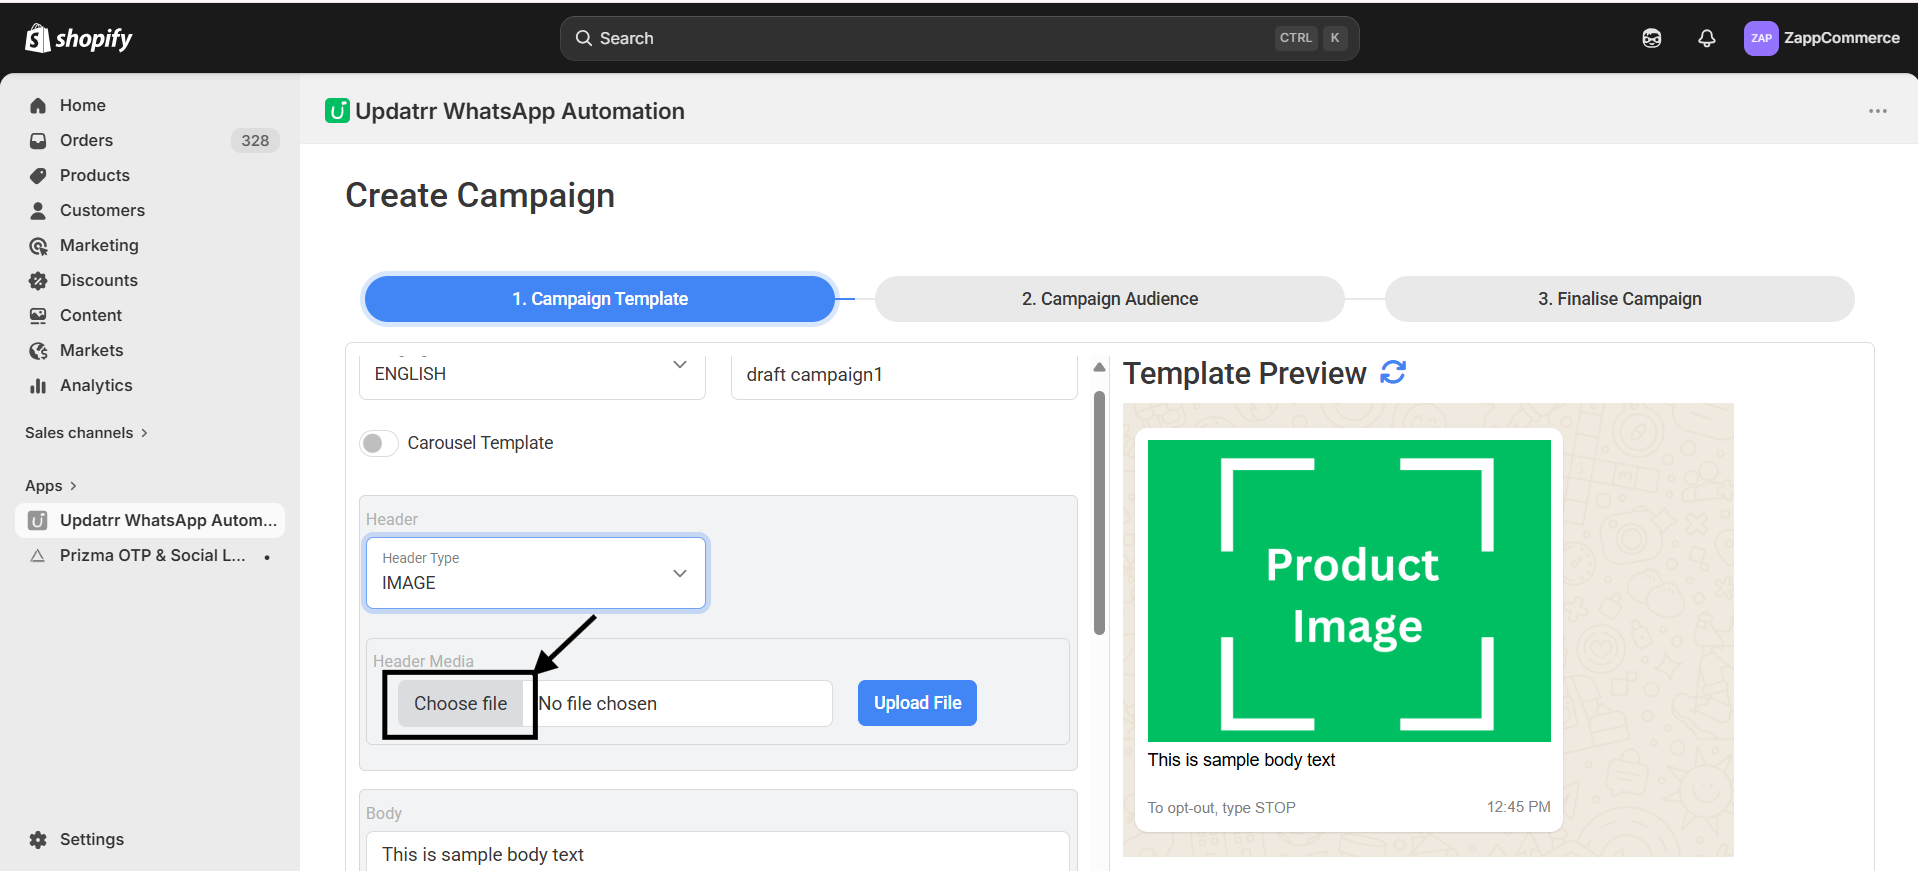
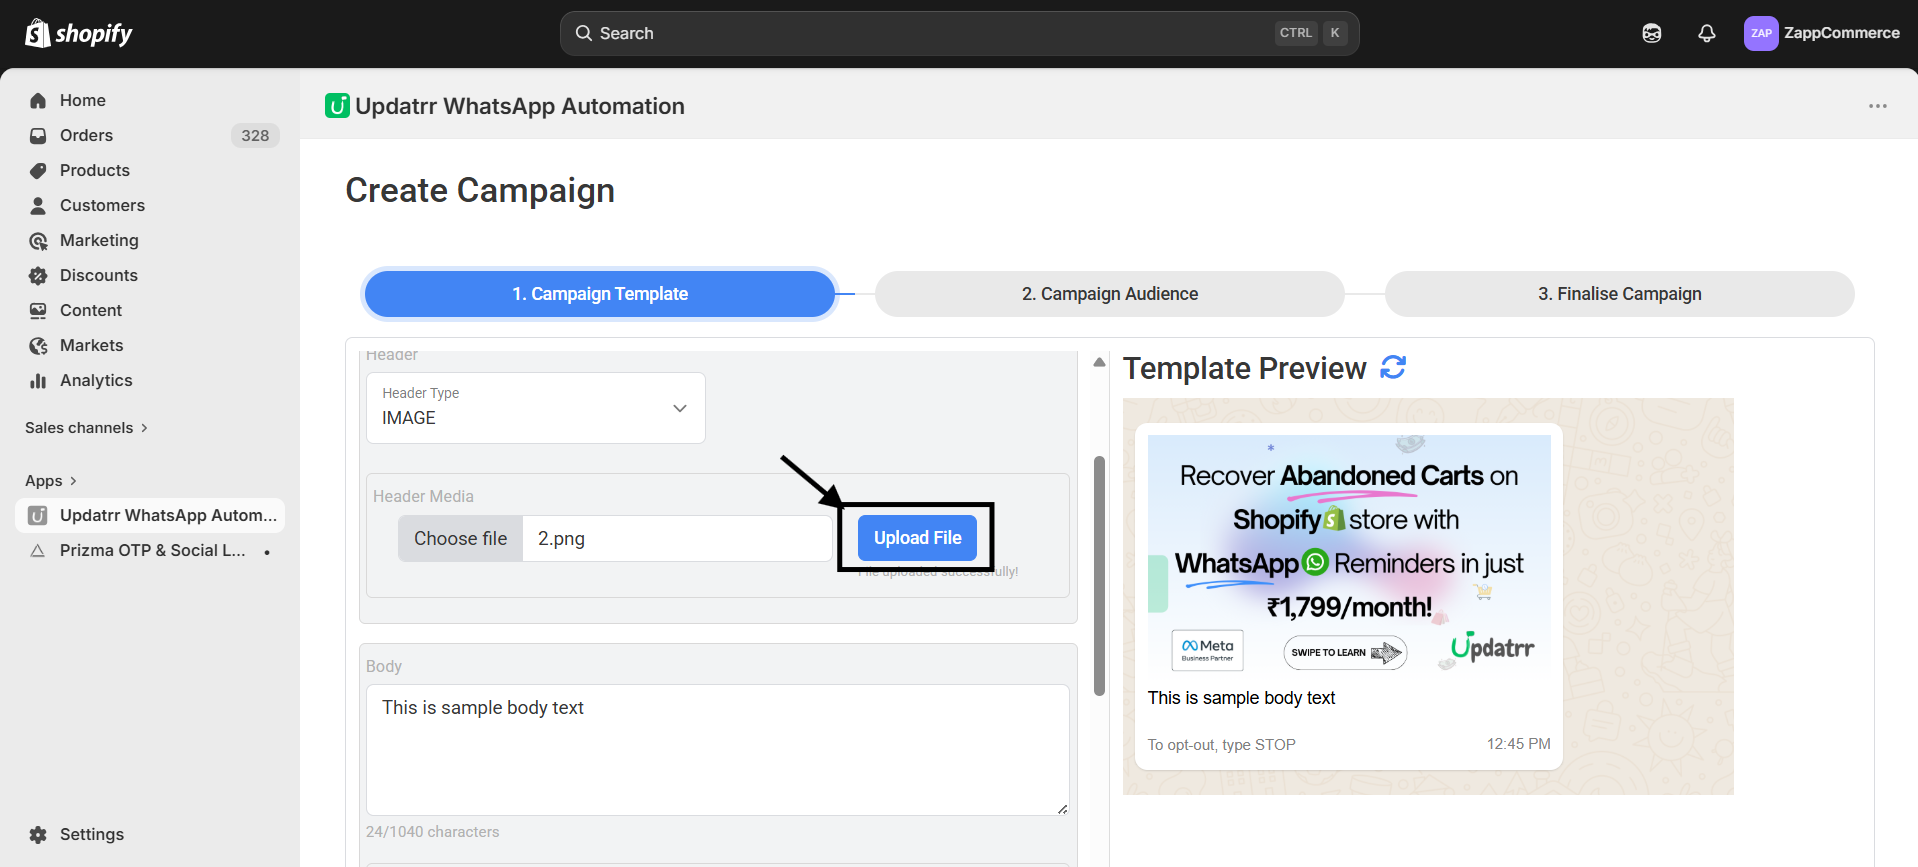
Step 6: Choose Your Photo Click Choose File to pick a great product photo from your computer. Once you've picked it, hit the blue Upload File button. You'll see it pop up in the preview on the right!
Part 3: Writing the Message
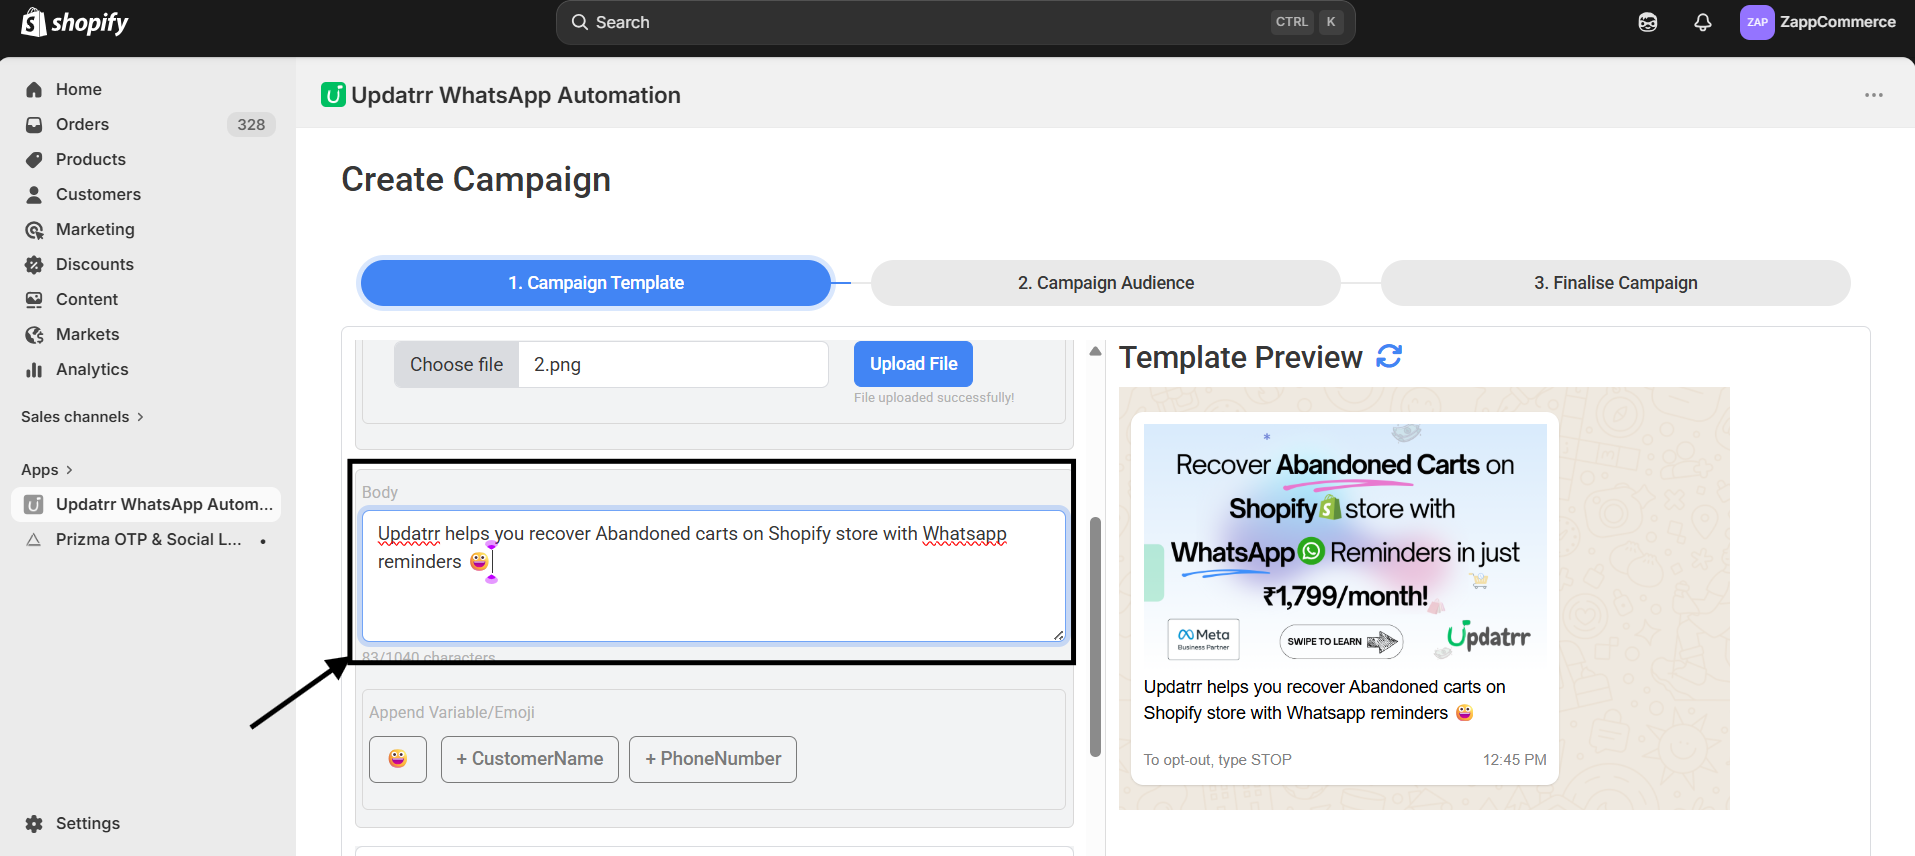
Step 7: Write Your Text In the Body box, write what you want to say to your customers. Keep it short, fun, and exciting!
Step 8: Make it Personal Want to use the customer's actual name? Just click the + CustomerName button. Updatrr will automatically swap that out for each person’s real name—it feels much more personal!
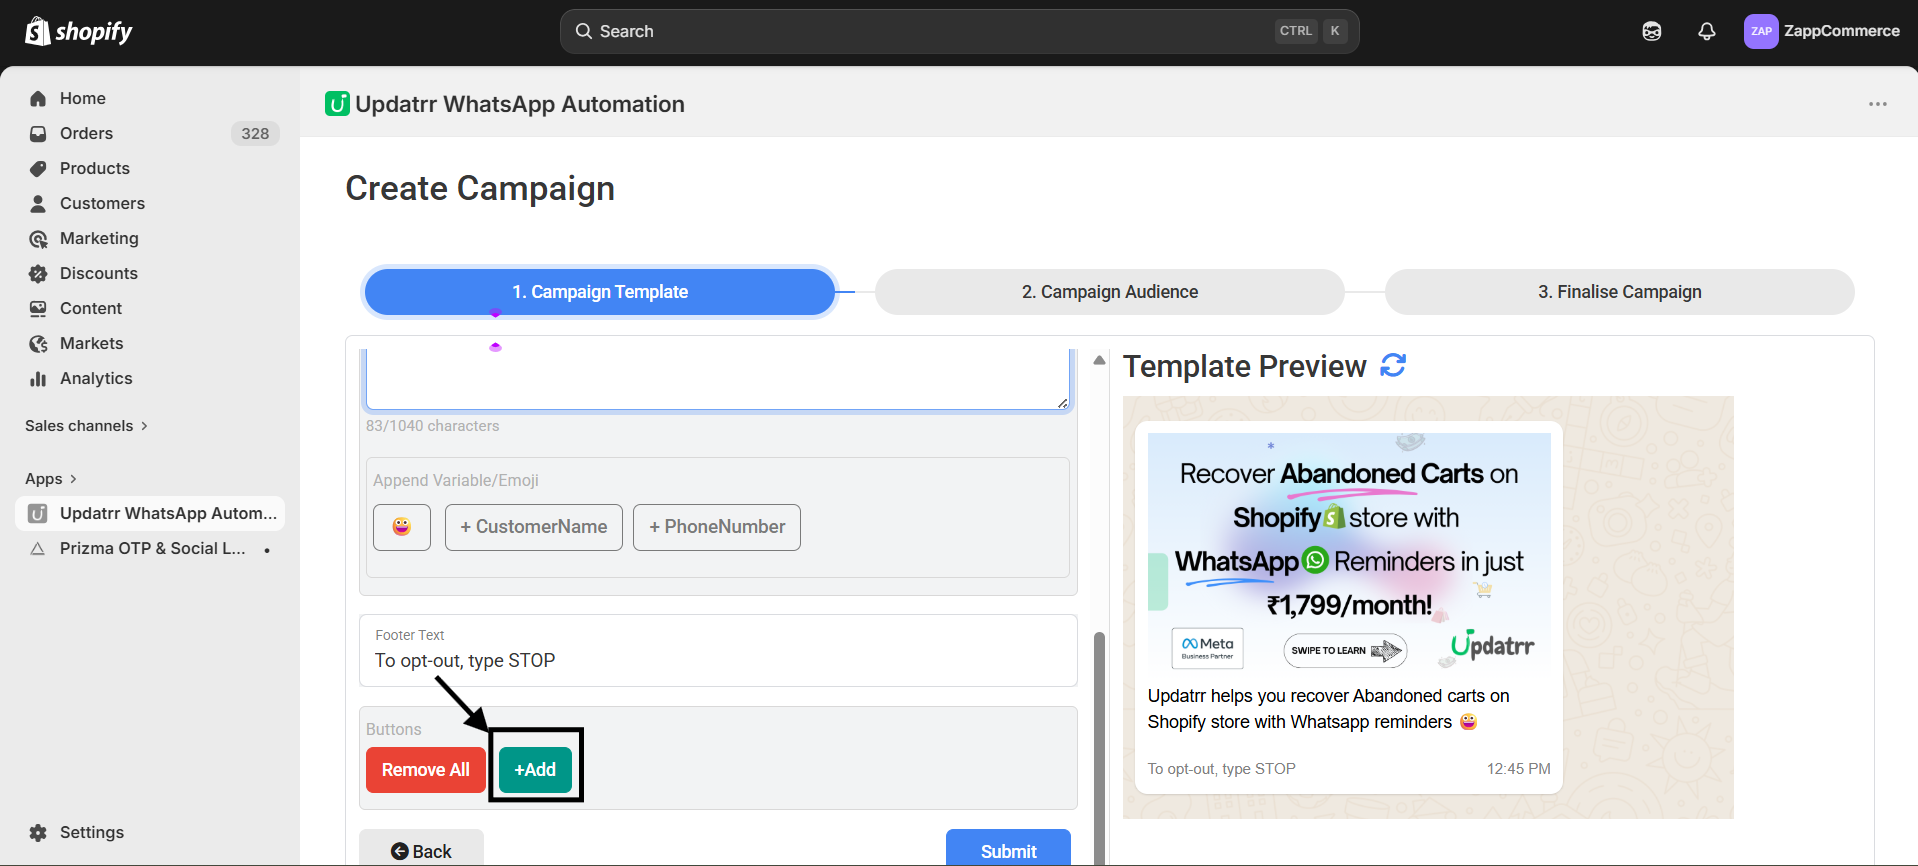
Step 9: Add an Opt-out It's always good practice to let customers know how to stop messages. Use the Footer Text to add something simple like: "To opt-out, type STOP."
Part 4: Adding the "Click"
Step 10: Add a Button This is how you get the sale! Click the + Add button. Choose URL to send them to your website, or Phone Number so they can call you. Give the button a label like "Shop Now!" and you're all set.
Part 5: Creating Your Interactive Buttons
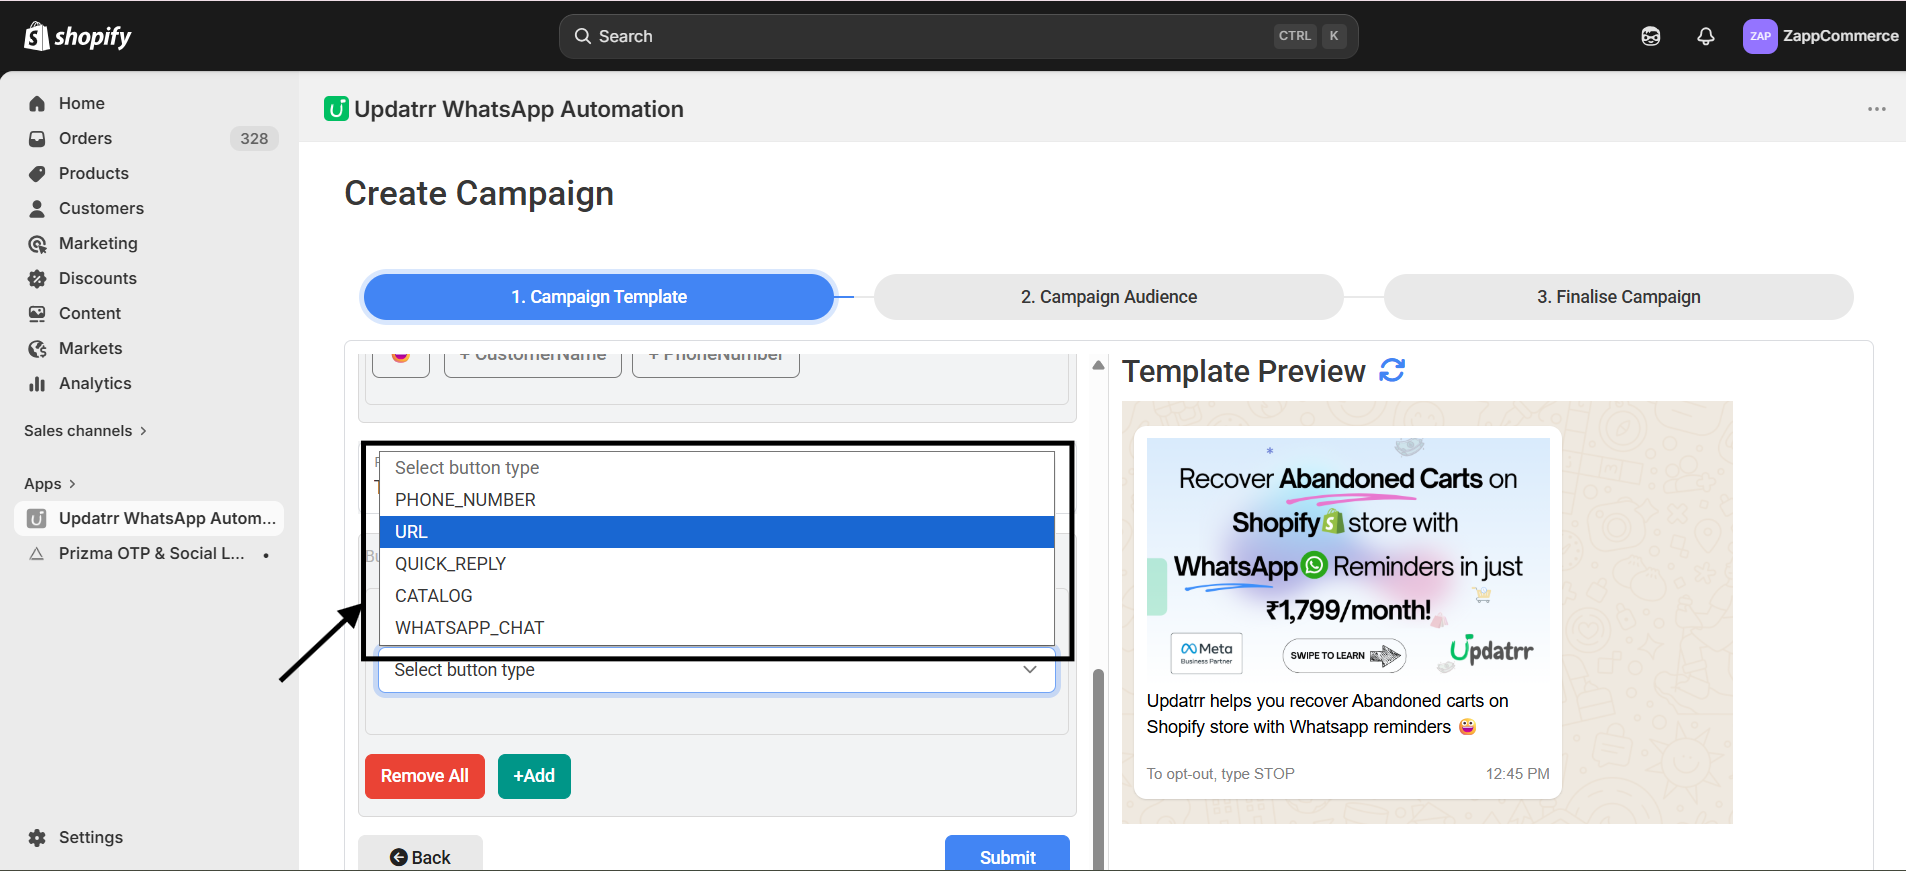
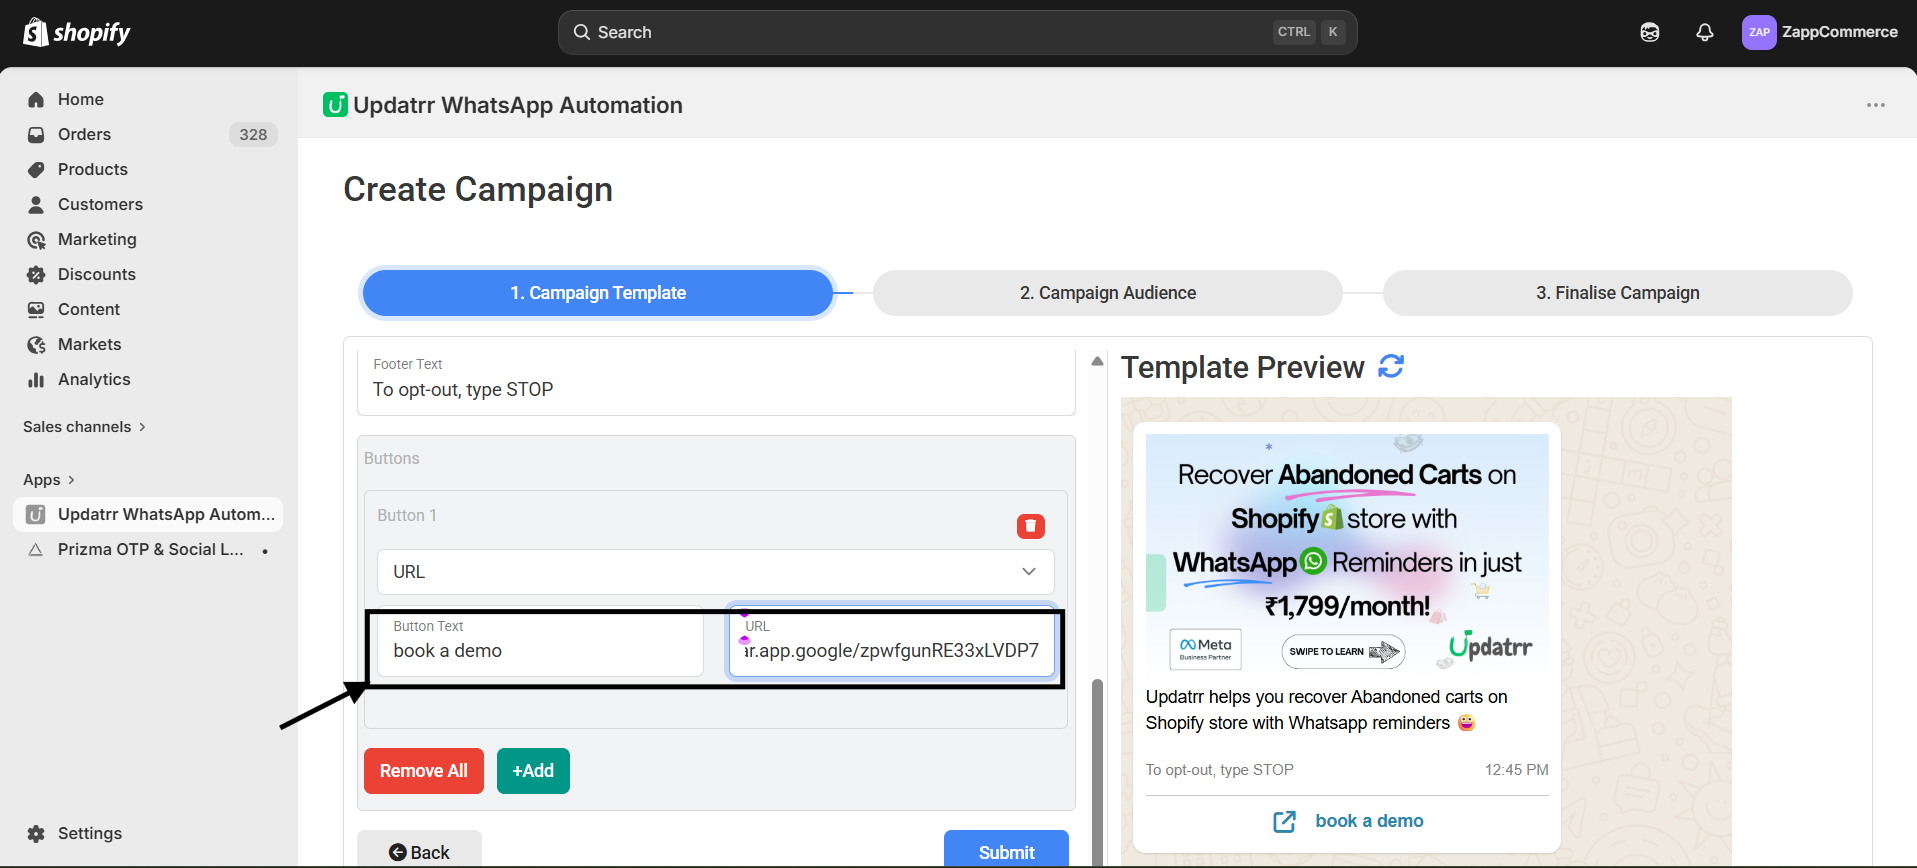
Step 11: Link Your Website If you want customers to visit a page, select URL. Type your button text (like "Book a Demo") and paste your link into the URL box. You’ll see it appear instantly in the preview!
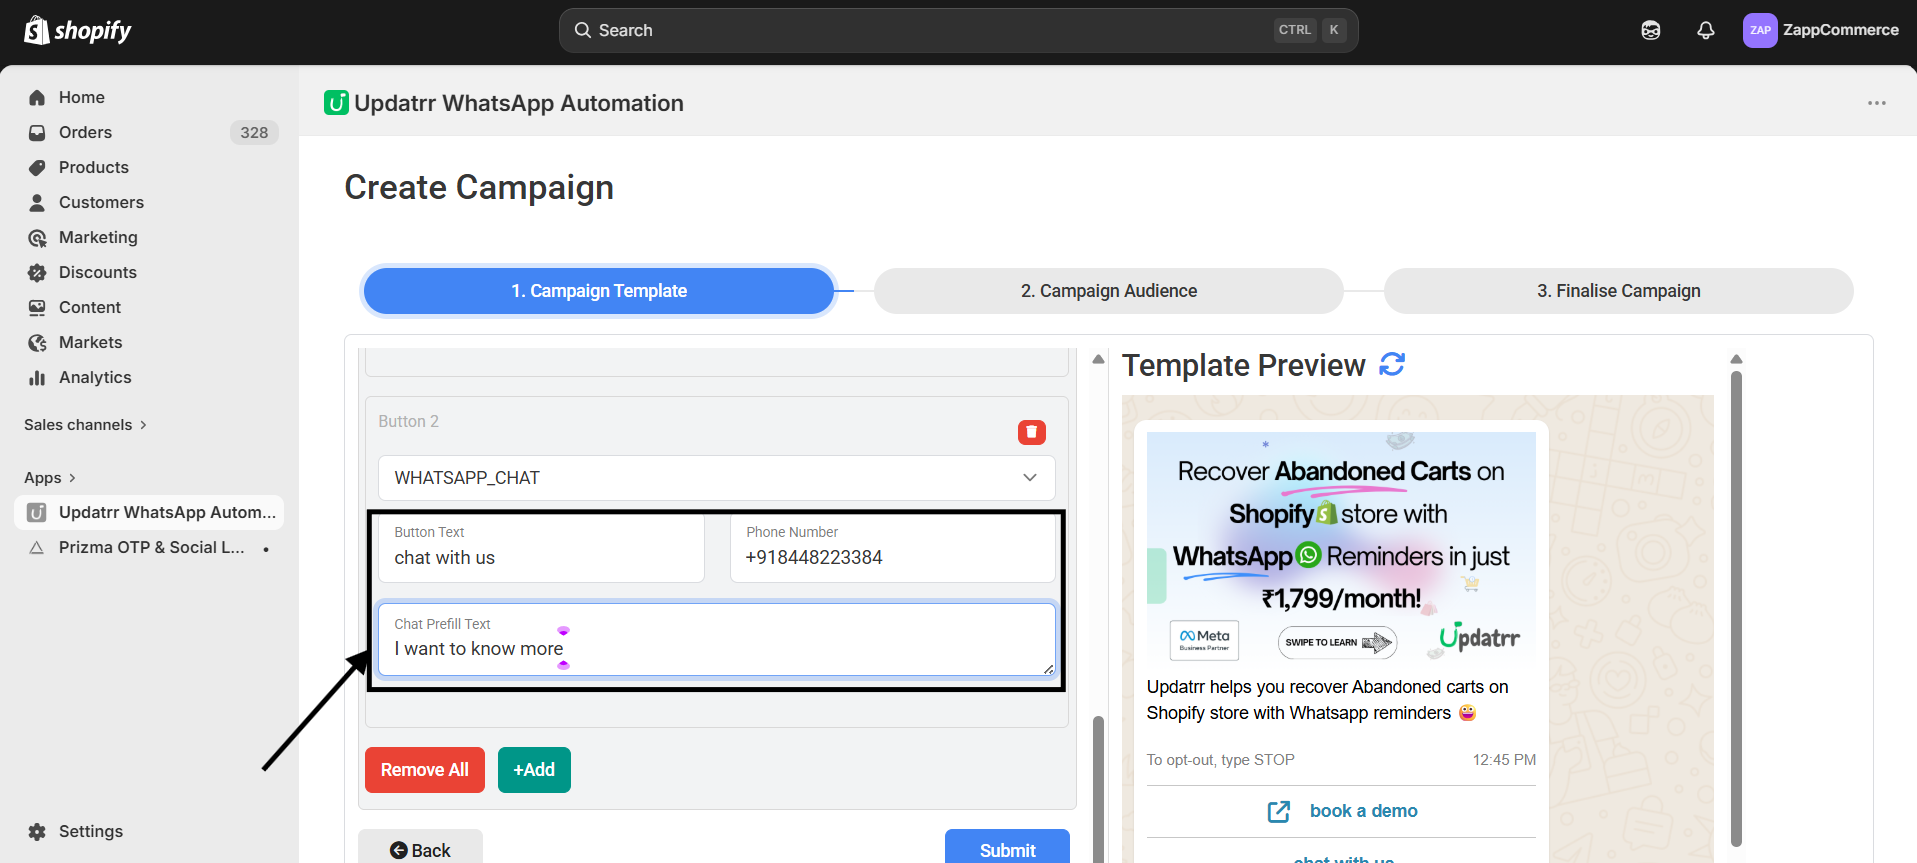
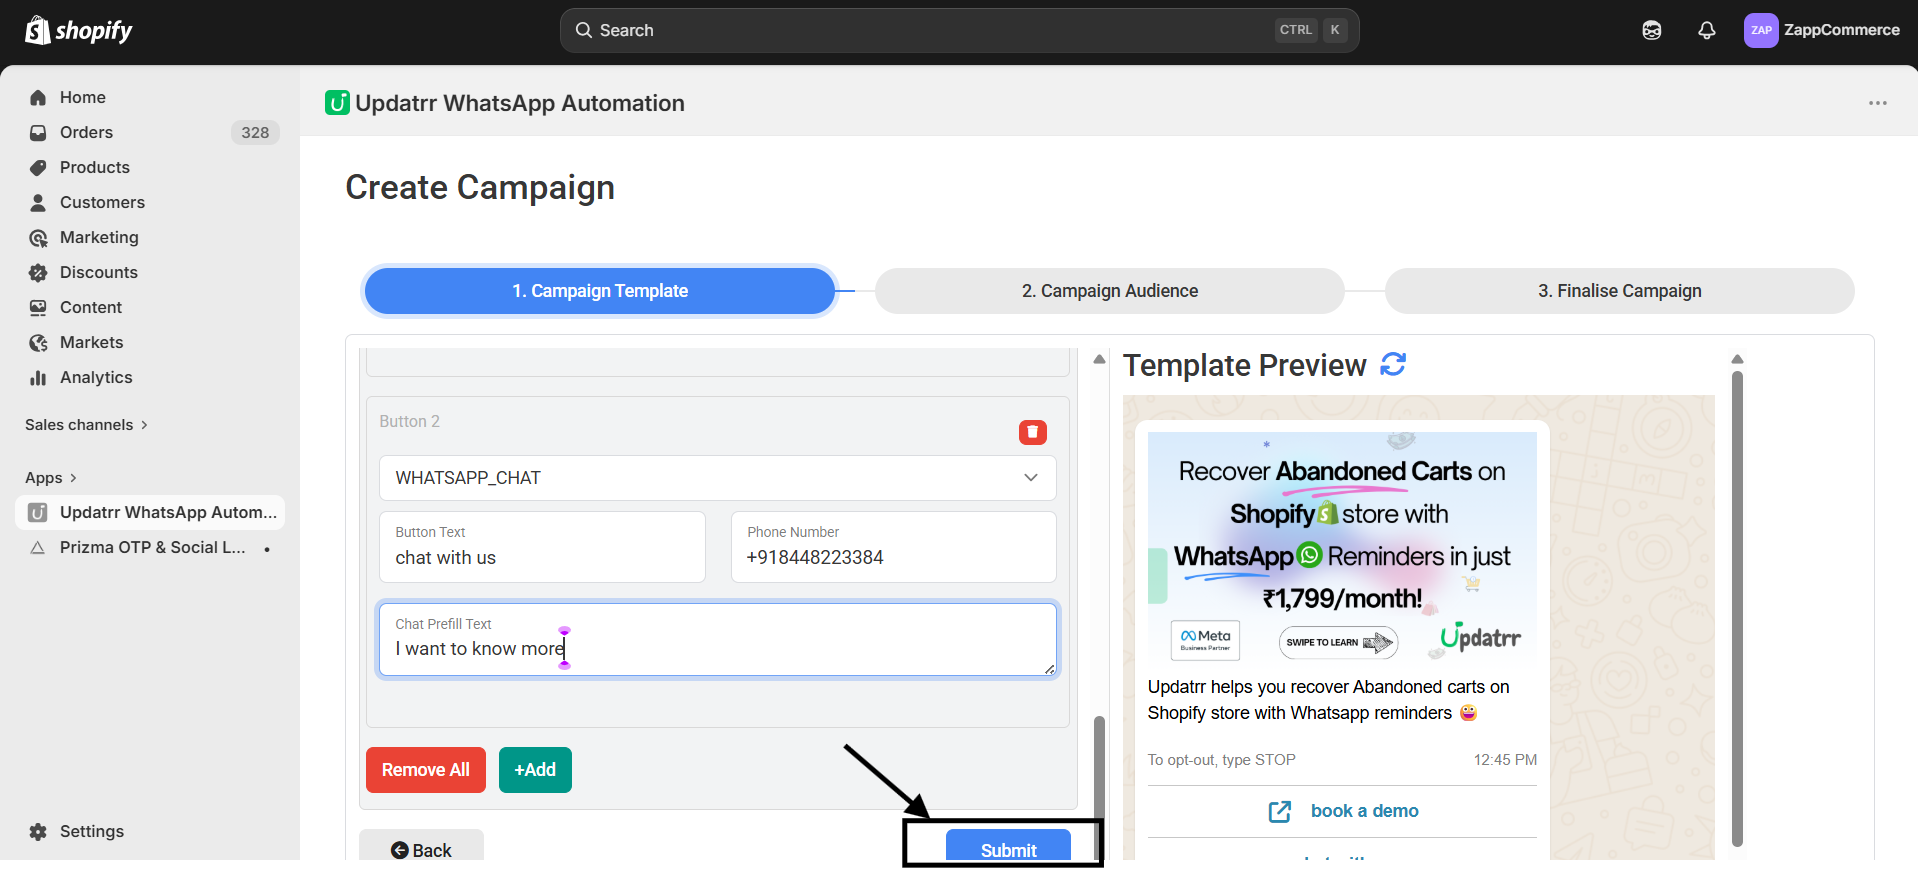
Step 12: Add a Direct Chat Button Want customers to talk to you? Click +Add again and choose WHATSAPP_CHAT. This creates a button that opens a direct chat with your business.

Step 13: Customize Your Chat You can even pre-fill the chat for them! In the Button Text, write something like "Chat with us," and in the Chat Prefill Text, add a message like "I want to know more." This makes it super easy for customers to start a conversation.
Step 14: Save Your Work Once your buttons look perfect in the preview, click the blue Submit button at the bottom.
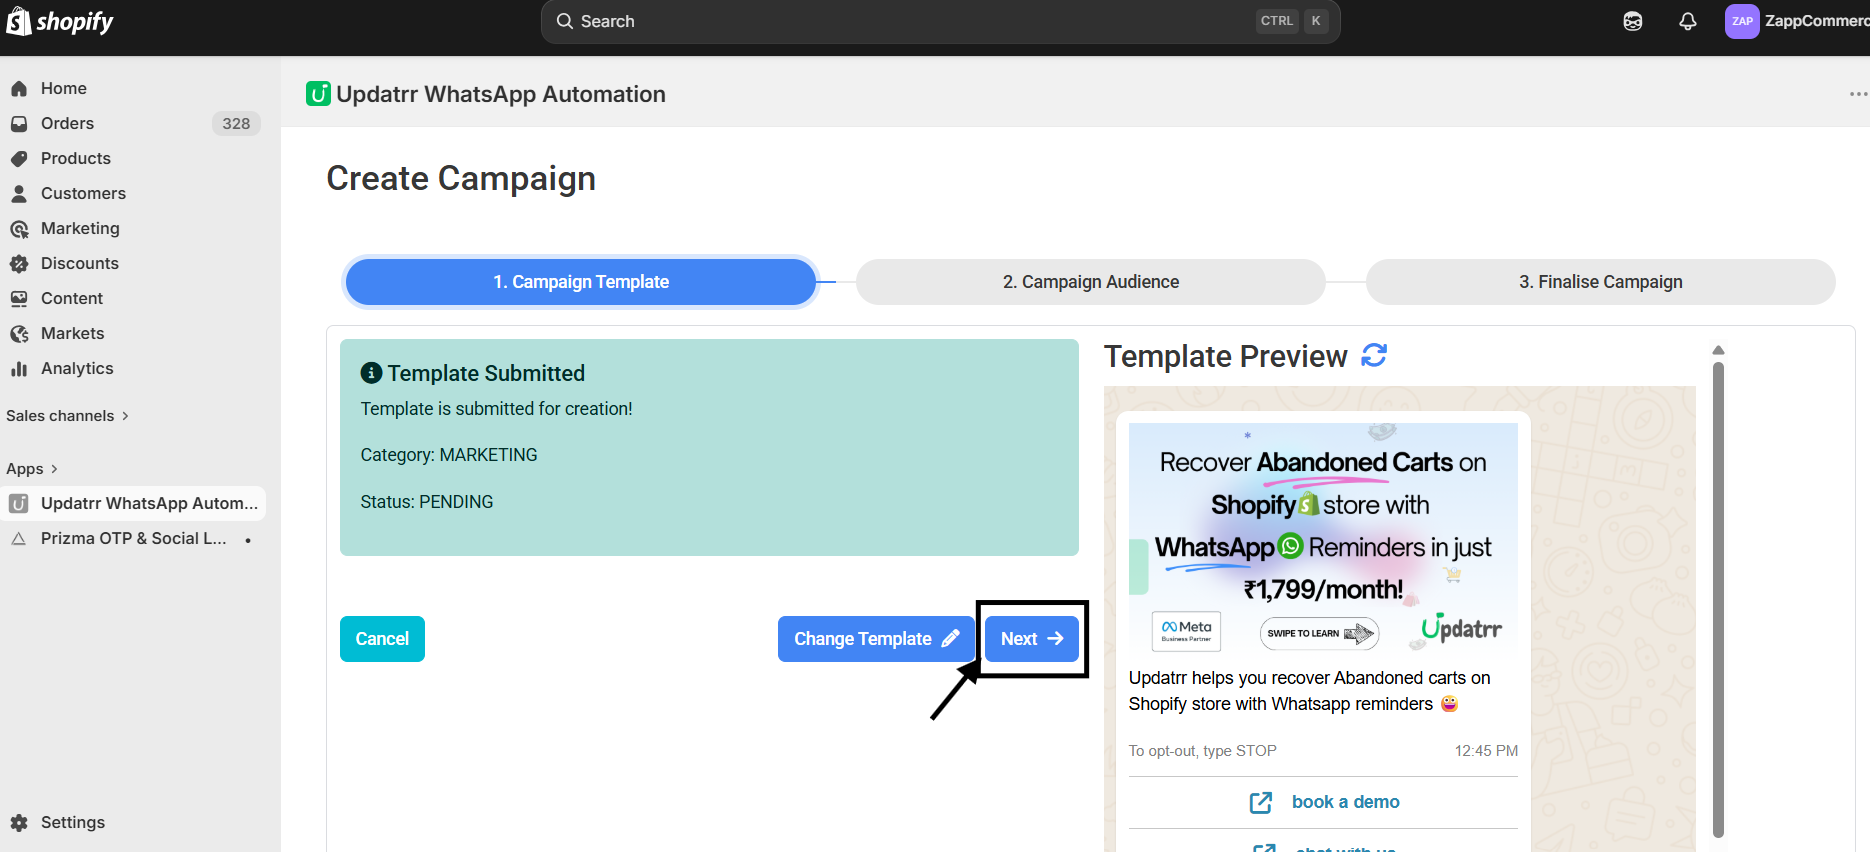
Step 15: Confirm Your Template A popup will appear letting you know your template is submitted. Just click OK to move to the next stage.

Step 16: Move to the Audience Step You’ll now see a green "Template Submitted" status. Click the blue Next button to choose who will receive your message.
Part 6: Choosing Who to Send it To
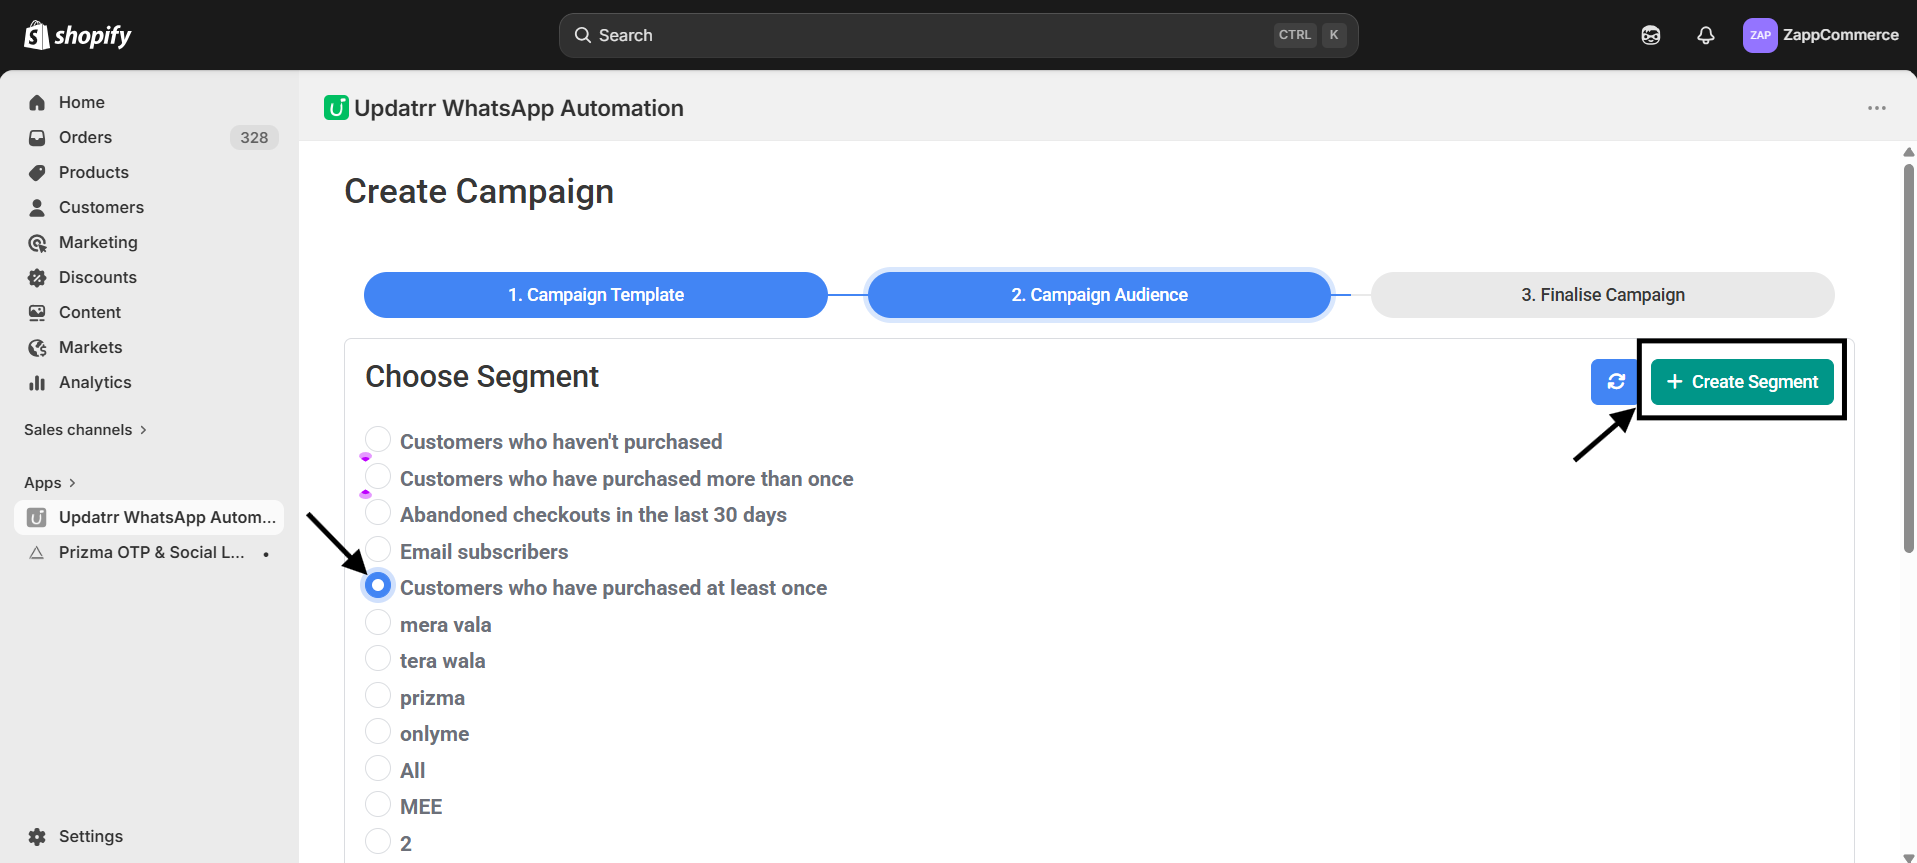
Step 17: Pick Your Segment You can choose from groups like "Customers who have purchased at least once." If you want to create a brand new group, just click the green + Create Segment button on the right.
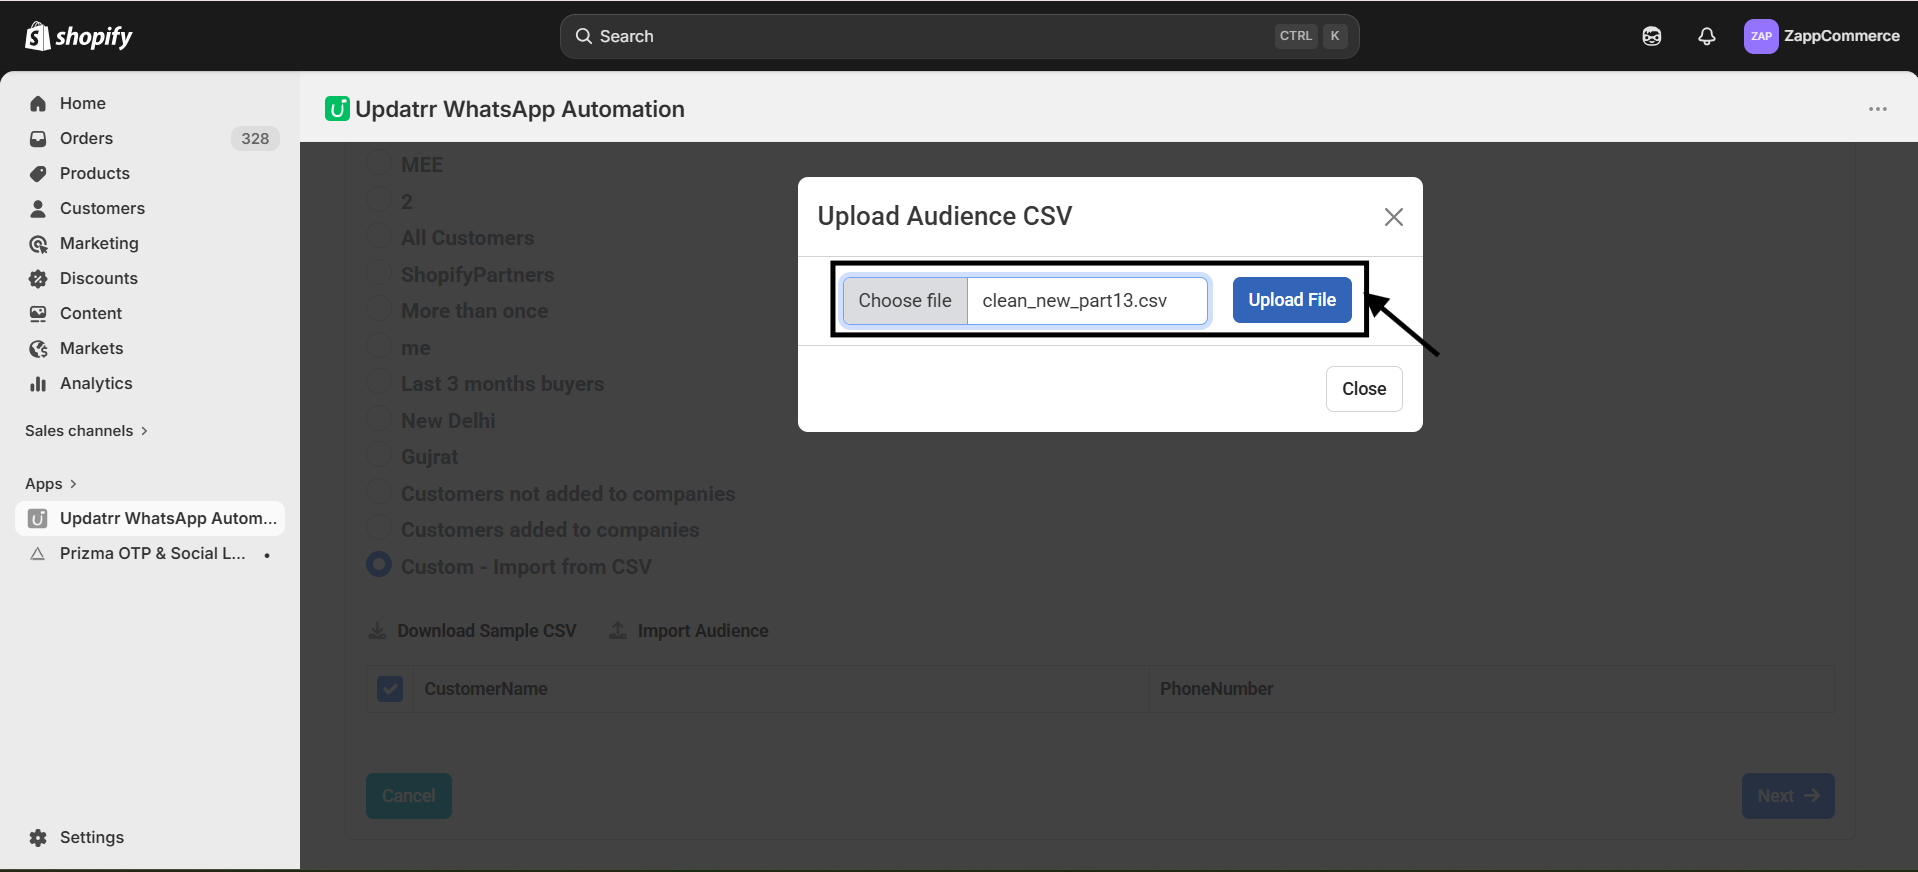
Step 18: Upload Your Own List If you have a specific list of numbers, scroll down and select Custom - Import from CSV. This is perfect for reaching a specific group of people you've already identified.
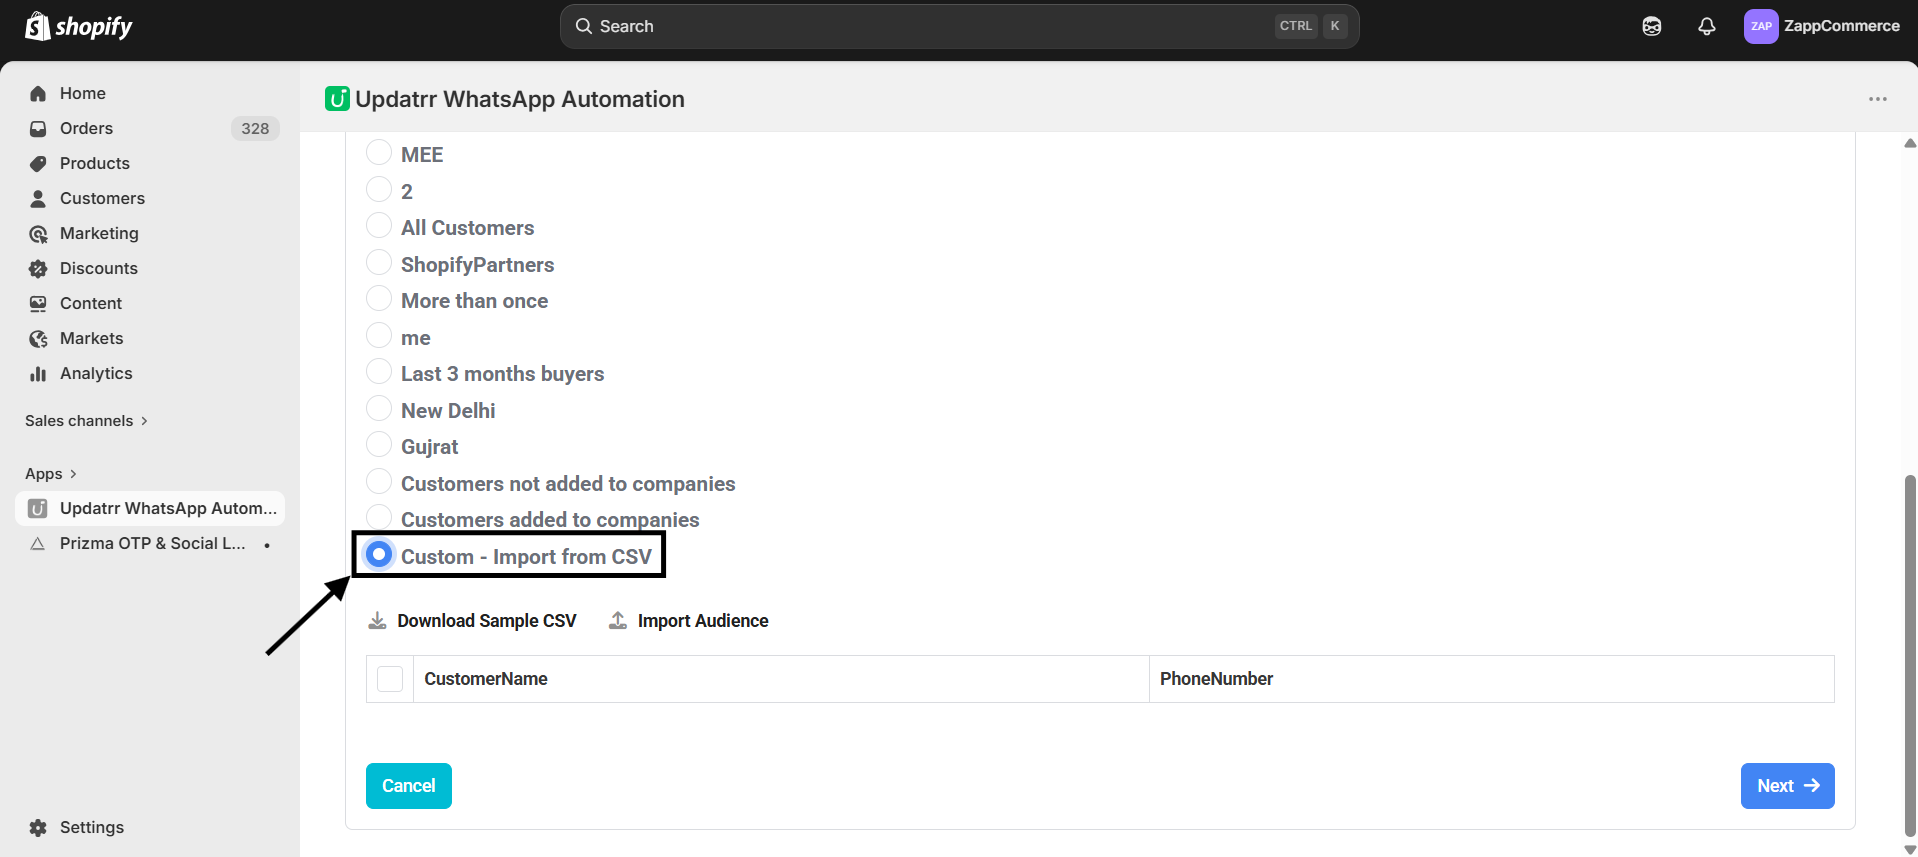
Step 19: Upload Your File Click on Import Audience and then Choose File to pick your CSV list from your computer. Once it's selected, click the blue Upload File button.
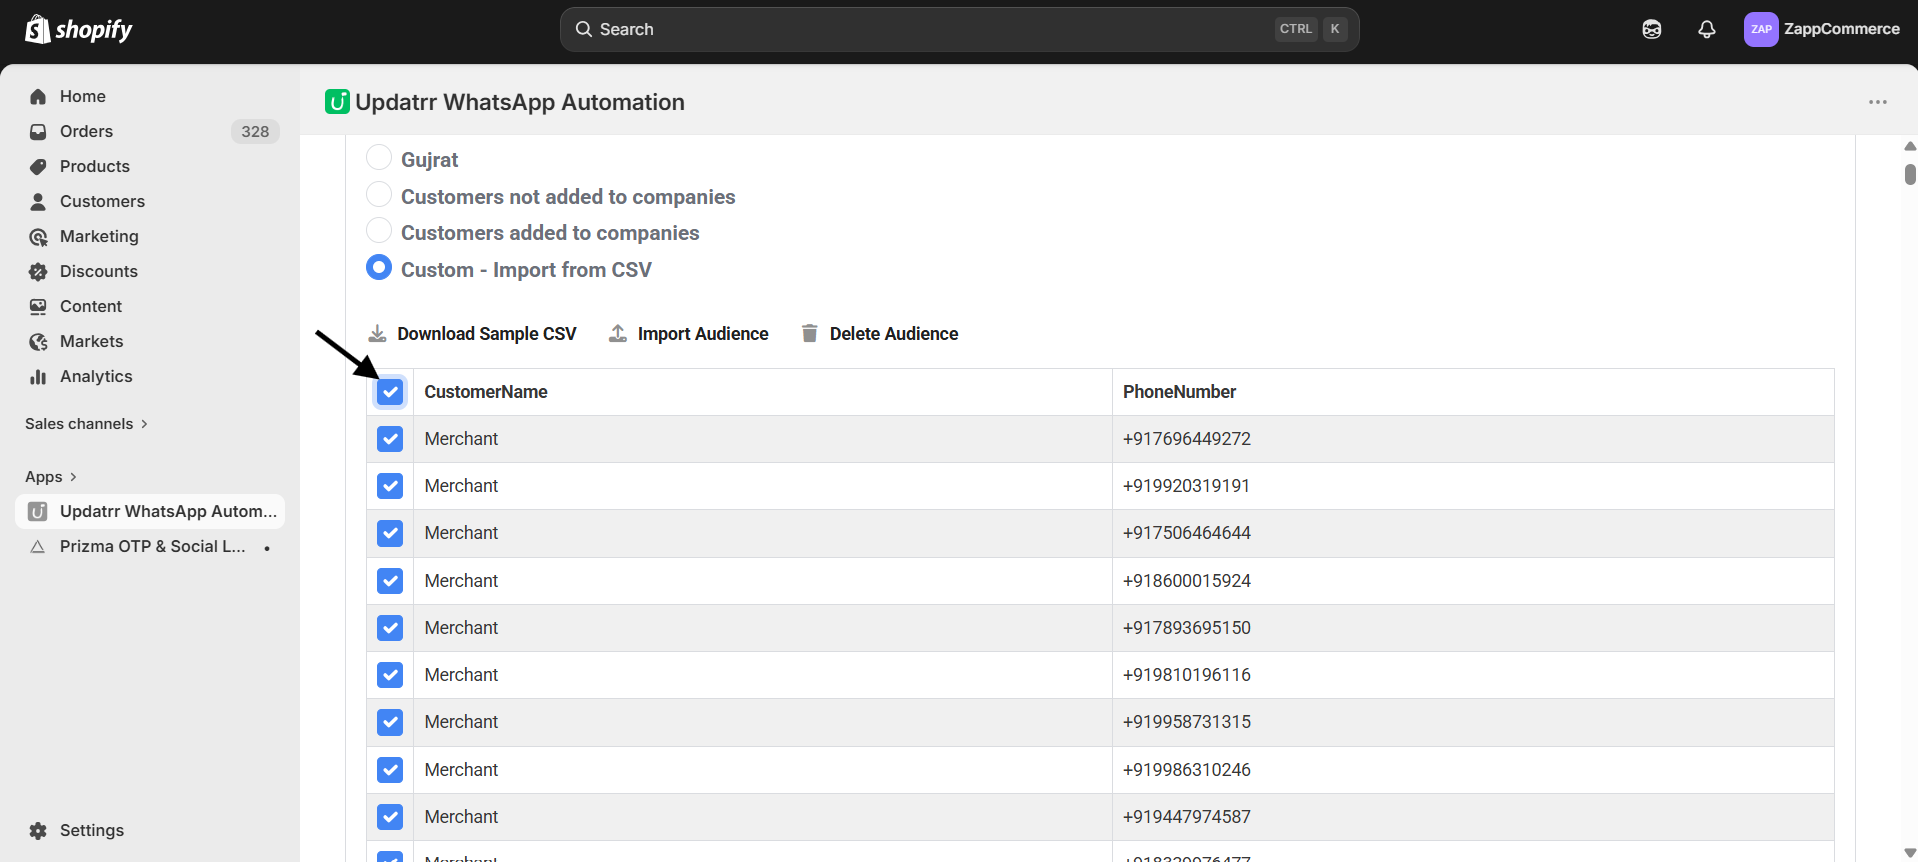
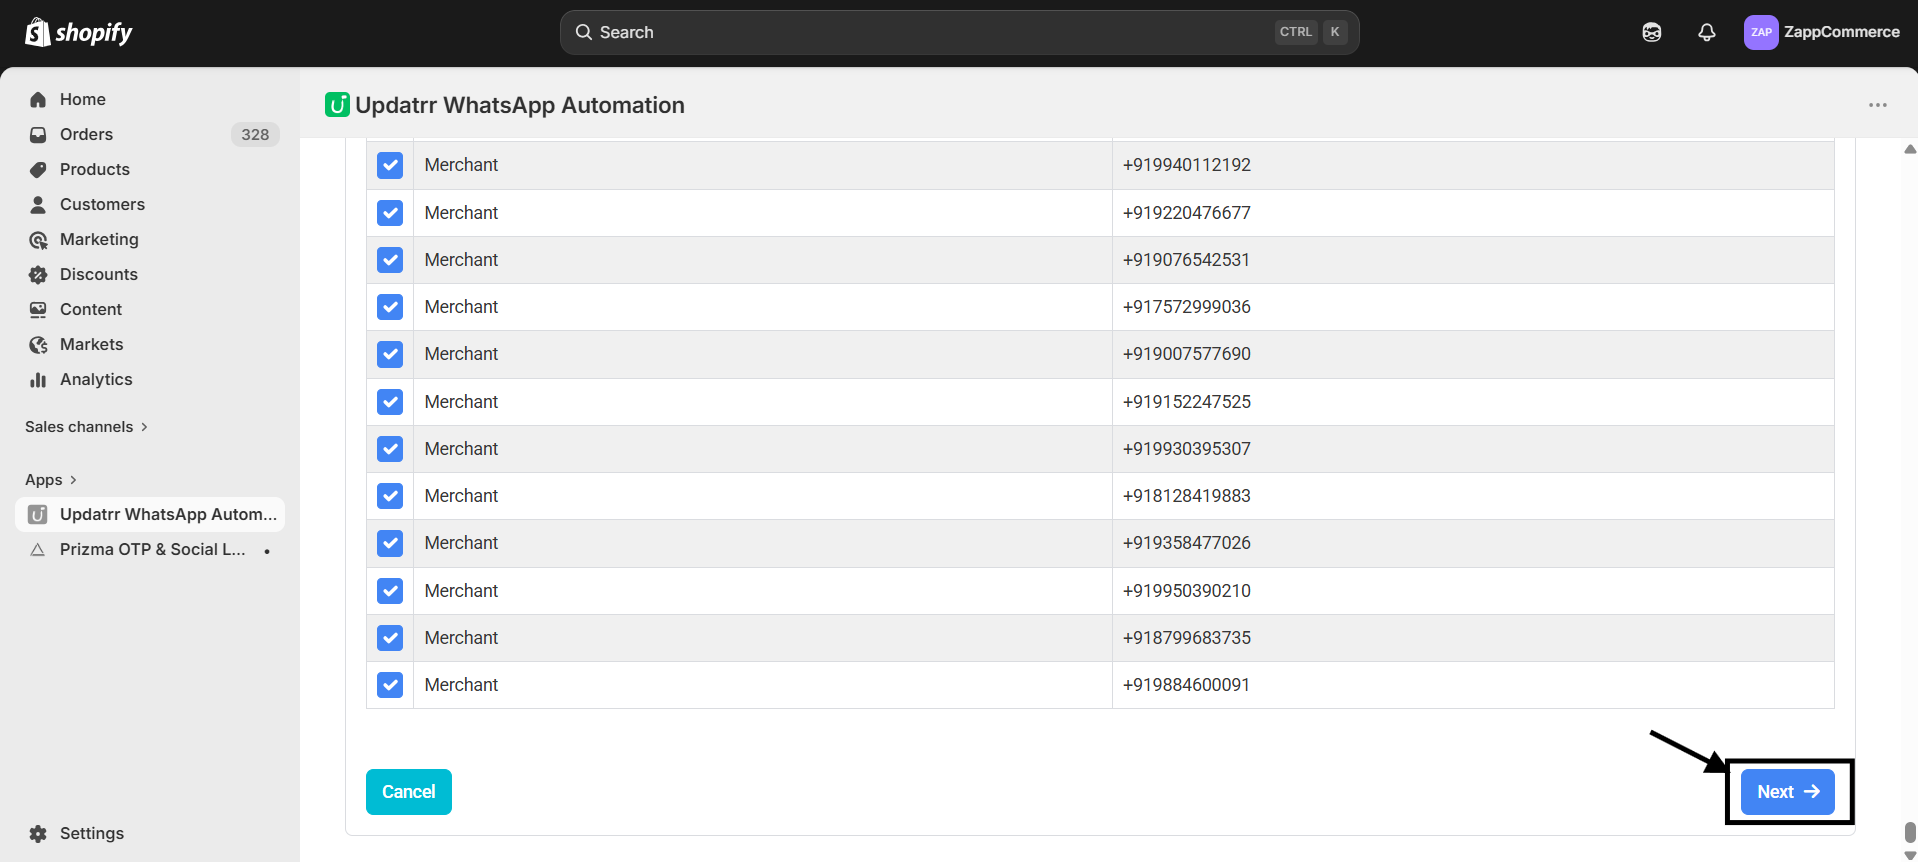
Step 20: Select Your Contacts Once your list is uploaded, you’ll see the names and numbers appear. Make sure the checkboxes are ticked for the people you want to reach, and you are ready for the final step!
Quick Tip: Adding a "Chat with us" button is a great way to build trust and answer customer questions instantly!
Part 7: Finalizing and Scheduling
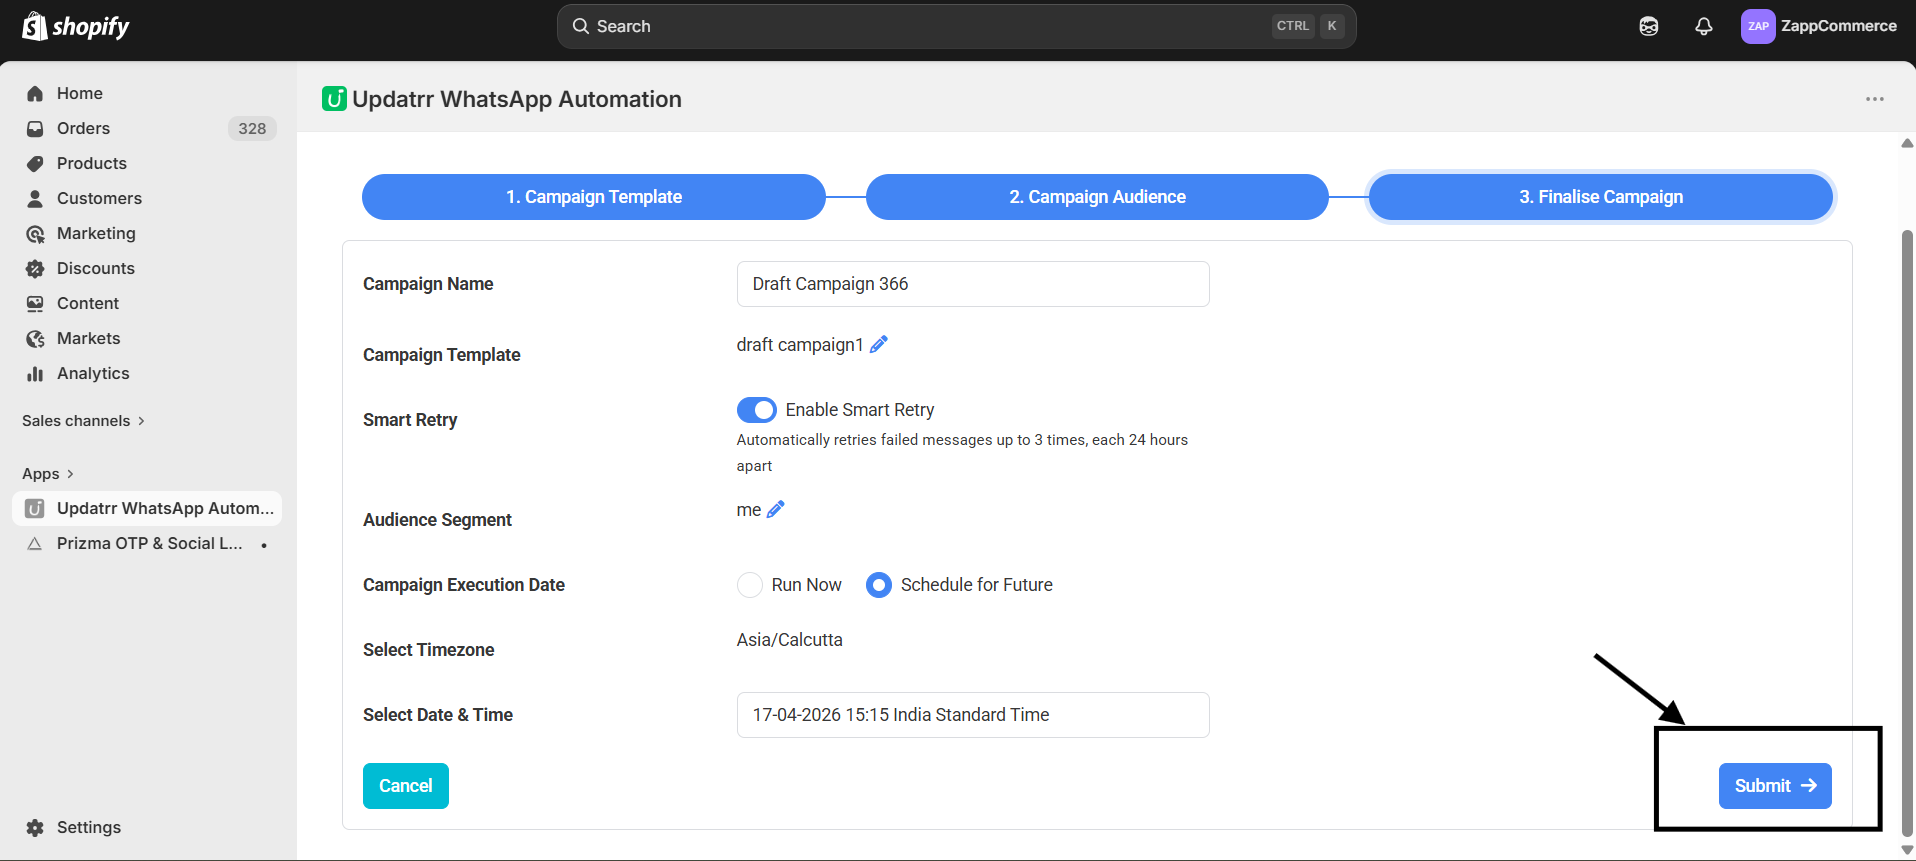
Step 21: Confirm Your List Once you’ve selected your audience, scroll to the bottom and click the blue Next button. This takes you to the final review page.
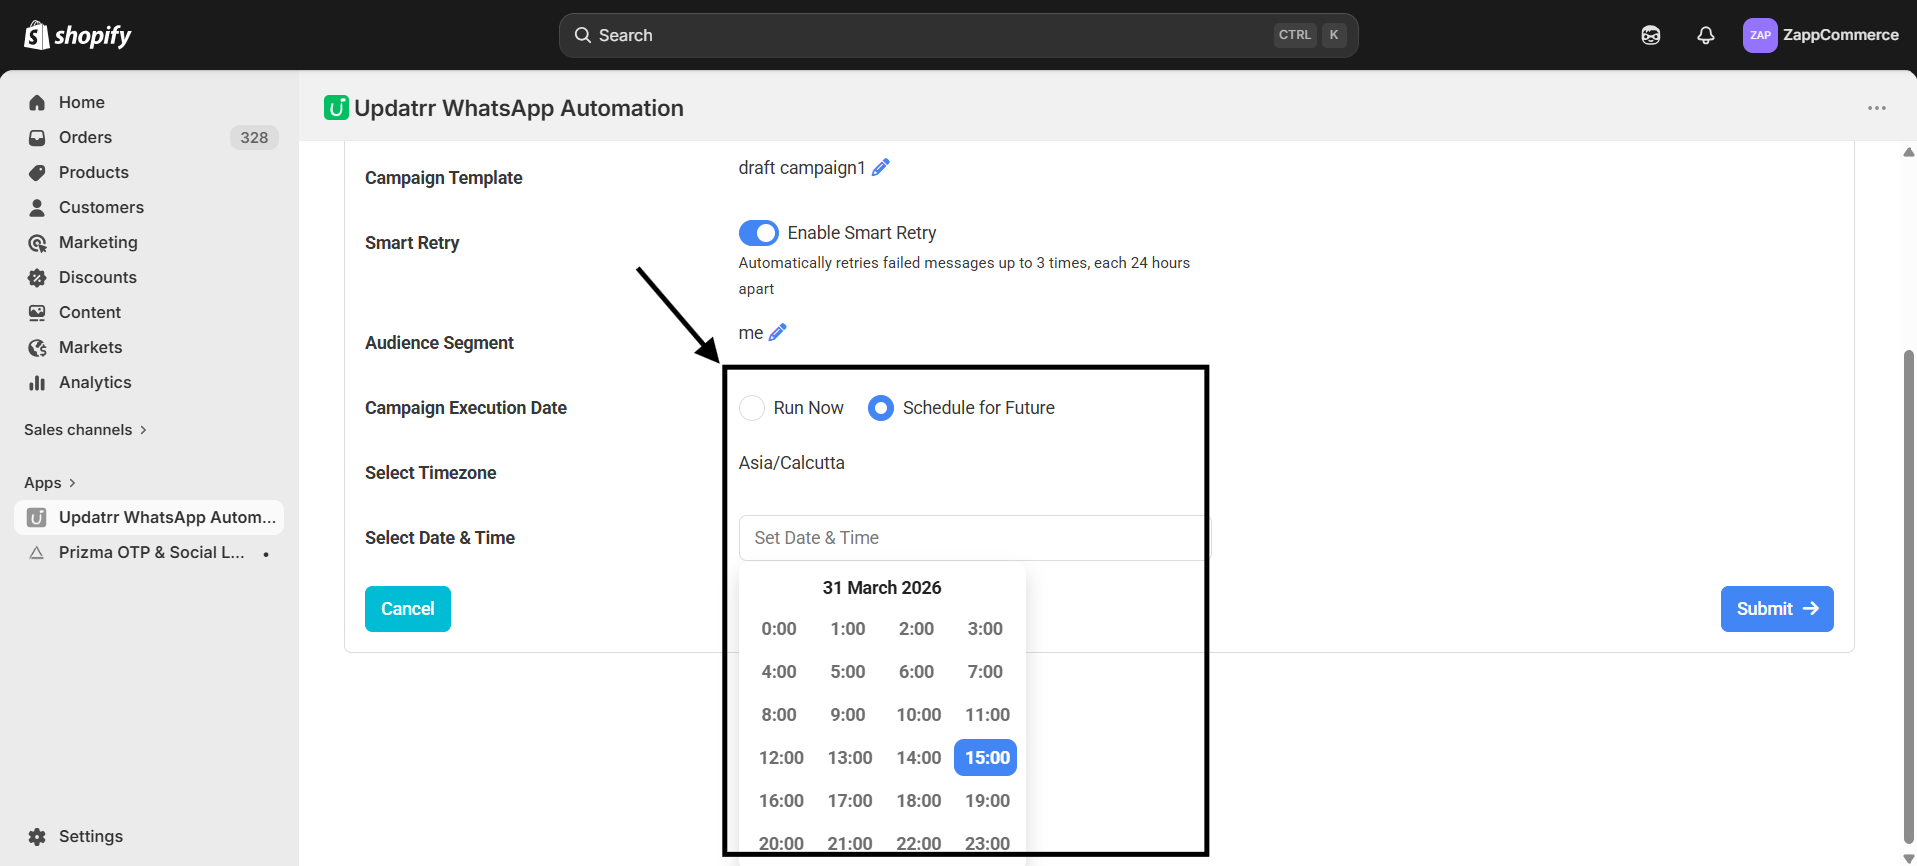
Step 22: Enable Smart Retry Toggle on Enable Smart Retry. If a message fails because a customer is offline, Updatrr will automatically try sending it again—up to 3 times!
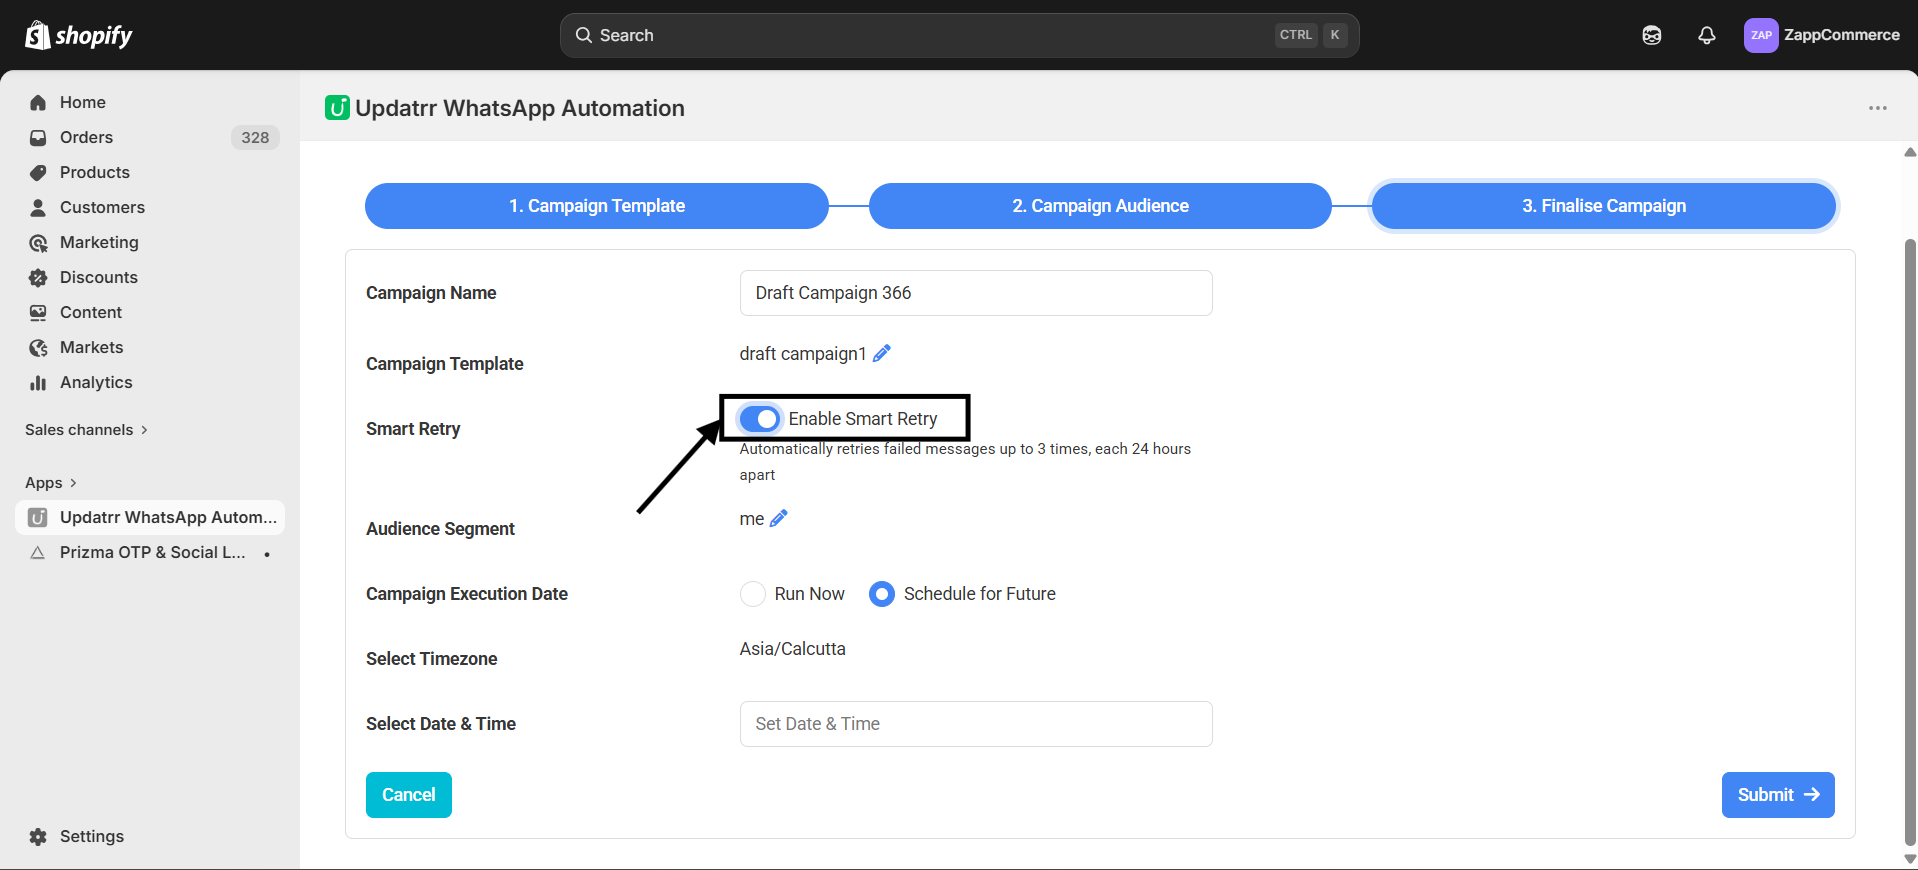
Step 23: Pick Your Timing
Run Now: Send it immediately.
Schedule for Future: Pick the exact date and time using the calendar and clock.
Step 24: Launch Your Campaign! Double-check your campaign name and audience one last time. Everything looks good? Click the blue Submit button.
Congratulations! Your WhatsApp Broadcast is officially ready to go. Now, sit back and watch the results roll in!
Pro Tip: Scheduling your messages for Tuesday or Wednesday mornings usually gets the best response from customers!